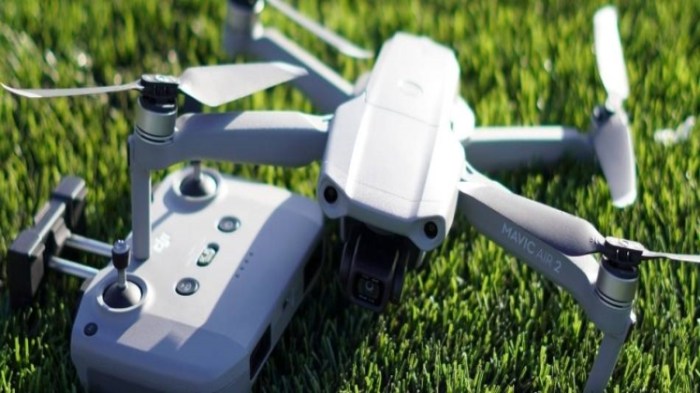
Smooth, stable footage is crucial for any drone pilot. However, gimbal issues can quickly derail your filming efforts. This guide tackles two prevalent problems: gimbal drift and malfunctioning motors. We’ll explore the causes, provide practical solutions, and offer preventative maintenance tips to ensure your gimbal performs flawlessly, resulting in high-quality aerial shots.
From understanding the nuances of calibration and balancing to troubleshooting motor issues and performing essential maintenance, we’ll equip you with the knowledge to diagnose and resolve these common problems. By following our step-by-step instructions and preventative measures, you can minimize downtime and maximize your drone’s potential.
Gimbal Drift

Gimbal drift, the unwanted movement of your drone’s camera despite the drone itself remaining stationary, is a frustrating but common issue. Understanding its causes and implementing effective solutions is key to capturing smooth, professional footage. This section will explore the various types of gimbal drift, their root causes, and practical steps to mitigate this problem.
Types and Causes of Gimbal Drift
Gimbal drift manifests in several ways. Slow, creeping movement is often caused by minor imbalances in the gimbal’s payload or slight imperfections in the internal mechanics. More pronounced, jerky movements might indicate a problem with the gimbal’s motor, internal sensors, or firmware. Environmental factors, such as strong winds or extreme temperatures, can also contribute significantly. Internal sensor errors can lead to the gimbal misinterpreting its position, resulting in erratic movements. Finally, insufficient calibration can leave the gimbal struggling to maintain its orientation accurately.
Calibrating a Drone Gimbal
Calibrating your drone’s gimbal is a crucial step in minimizing drift. The specific steps vary slightly depending on the drone model, but the general process involves placing the drone on a stable, level surface and following the instructions within your drone’s application or manual.
- Power on your drone and ensure it’s connected to your smartphone or remote controller.
- Locate the gimbal calibration option within the drone’s app or settings menu. This is often found under settings or camera options.
- Follow the on-screen prompts. This usually involves placing the drone on a level surface and allowing the gimbal to self-level and calibrate its sensors. The app might instruct you to move the drone slightly to aid the calibration process.
- Once the calibration is complete, test the gimbal’s performance by manually moving the camera. If drift persists, repeat the calibration process or consult your drone’s manual for further troubleshooting steps.
Payload Balancing for Reduced Drift
Properly balancing your drone’s payload is essential for minimizing gimbal drift. An unbalanced payload puts extra strain on the gimbal motors, leading to instability and drift.
- Ensure your camera and any additional accessories are securely attached to the gimbal.
- Carefully adjust the camera’s position on the gimbal mount until it is centered and balanced. Many gimbals have adjustable arms or mounting points to fine-tune the balance.
- Visually inspect the gimbal for any noticeable imbalance. The gimbal should remain relatively still when powered on and the drone is stationary.
- Test the gimbal’s performance after adjusting the payload balance. If drift persists, make minor adjustments until the optimal balance is achieved.
Comparison of Gimbal Calibration Methods
Different drones and apps offer various gimbal calibration methods. Here’s a comparison:
| Calibration Method | Pros | Cons | Suitable For |
|---|---|---|---|
| In-App Calibration | Convenient, user-friendly, often automated | May not be as thorough as manual methods, relies on app functionality | Most drone users |
| Manual Leveling and Calibration | More precise control, potential for addressing specific imbalances | Requires more technical knowledge and time | Experienced users, situations requiring high precision |
| Factory Reset and Recalibration | Can resolve deep-seated software issues affecting gimbal performance | Time-consuming, requires complete reset of drone settings | When other methods fail, software glitches suspected |
| Third-Party Software Calibration | Potentially offers advanced calibration options | May void warranty, risk of incompatibility, requires additional software | Advanced users, specific gimbal issues |
Environmental Factors and Gimbal Drift Mitigation
Wind and temperature fluctuations significantly impact gimbal stability. Strong winds directly exert force on the drone and camera, causing drift. Temperature changes can affect the performance of the gimbal’s internal motors and sensors.
- To mitigate wind-induced drift, avoid flying in high-wind conditions. If flying is unavoidable, use a windbreak or choose a sheltered location.
- Extreme temperatures can affect gimbal motor performance. Allow your drone to acclimatize to the ambient temperature before flying to minimize thermal drift.
Gimbal Motor Issues
Gimbal motor problems are a common source of frustration for drone operators. These issues can range from minor annoyances, such as slightly jerky movements, to complete gimbal failure, rendering your drone unusable. Understanding the signs of malfunction and having a systematic troubleshooting approach can save you time and money in the long run. This section will guide you through identifying, diagnosing, and potentially repairing these problems.
Identifying Malfunctioning Gimbal Motors
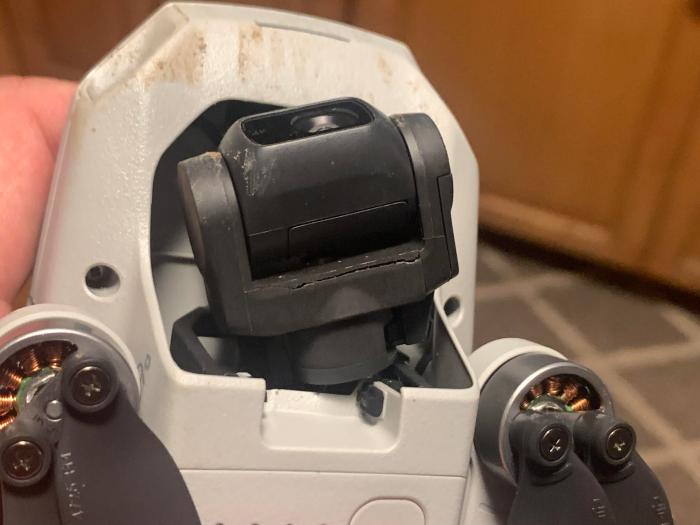
Several signs indicate potential problems with your gimbal motors. Unusual noises, such as grinding, clicking, or whining, are often the first indicators. These sounds suggest mechanical wear, binding, or electrical issues within the motor. Jerky or erratic movements during operation, even with minimal wind, are another key symptom. The gimbal might struggle to maintain a stable position, exhibiting noticeable vibrations or oscillations. In severe cases, the motor might completely fail to respond, resulting in a completely unresponsive gimbal. Finally, overheating of the motor, which you might detect by touch (carefully!), could signify a problem with the motor’s internal components or excessive load.
Checking Gimbal Motor Connections and Wiring
Before attempting any internal repairs, carefully inspect the gimbal motor connections and wiring. Loose connections are a frequent culprit of gimbal motor problems. Gently disconnect and reconnect each connector, ensuring a firm and secure connection. Visually inspect the wires for any signs of damage, such as fraying, cuts, or exposed wires. Look for any kinks or bends that might be restricting the wires’ movement. Pay close attention to the area where the wires enter the gimbal motor housing, as this is a common point of wear and tear. If any damage is found, carefully repair or replace the affected wires, using appropriately sized and rated wire.
Cleaning and Lubricating Gimbal Motors
Cleaning and lubricating gimbal motors can sometimes resolve minor issues, such as jerky movements caused by accumulated dust or debris. However, proceed with extreme caution. Disassembly of the gimbal motor is usually not recommended unless you are experienced in micro-electronics repair. If you decide to clean, use a compressed air canister to gently blow away dust and debris from the motor’s exterior and accessible components. For lubrication, only use a very small amount of high-quality, low-viscosity lubricant specifically designed for precision mechanisms. Apply the lubricant sparingly, avoiding excessive amounts that could attract more dust and debris. Avoid using oil-based lubricants as they can attract more dirt.
Troubleshooting Gimbal Motor Problems: A Flowchart
The following flowchart Artikels a systematic approach to troubleshooting gimbal motor problems:
[Imagine a flowchart here. The flowchart would begin with “Gimbal Motor Problem?” with a “Yes” branch leading to “Unusual Noises?” and a “No” branch leading to “Other Gimbal Issues.” The “Unusual Noises?” branch would have “Yes” leading to “Inspect Connections/Wiring” and “No” leading to “Check for Obstructions.” “Inspect Connections/Wiring” would have a “Problem Found?” branch with “Yes” leading to “Repair/Replace Wiring” and “No” leading to “Clean/Lubricate Motor.” “Check for Obstructions” would have a “Obstruction Found?” branch with “Yes” leading to “Remove Obstruction” and “No” leading to “Advanced Troubleshooting/Repair.” All paths ultimately lead to “Problem Solved?” with a “Yes” branch leading to “End” and a “No” branch leading to “Seek Professional Help.”]
Common Spare Parts for Gimbal Motor Repair
Repairing a gimbal motor often requires replacing specific components. Common spare parts include:
- Gimbal Motor: The cost varies greatly depending on the drone model and the motor’s specifications. Expect to pay anywhere from $20 to $100 or more.
- Wiring Harness: Replacement wiring harnesses typically cost between $10 and $30, depending on complexity.
- Connectors: Individual connectors are relatively inexpensive, usually costing less than $5 each.
- Bearings: These small but crucial components can cost between $5 and $20 per bearing, depending on the size and type.
- Brushes (for brushed motors): Replacement brushes are inexpensive, usually costing a few dollars per set.
Note that these are estimated costs and can vary depending on the supplier and the specific drone model.
Preventing Future Gimbal Problems

Maintaining your drone’s gimbal is crucial for ensuring its longevity and optimal performance. Neglecting regular care can lead to premature wear and tear, resulting in costly repairs or even complete gimbal failure. By following a few simple steps and incorporating preventative maintenance into your drone operation routine, you can significantly extend the life of your gimbal and avoid many common issues.
Gimbal Maintenance and Cleaning
Regular cleaning and maintenance are essential for preventing dirt, dust, and debris from accumulating on the gimbal’s sensitive components. These particles can interfere with the smooth operation of the motors and sensors, leading to drift, jerky movements, and ultimately, damage. Begin by gently wiping the gimbal with a soft, lint-free cloth. For stubborn dirt, use a slightly damp cloth (avoid excessive moisture) and carefully clean around the motor shafts and sensor areas. Avoid using harsh chemicals or solvents, as these can damage the gimbal’s delicate components. Compressed air can be helpful for removing dust from hard-to-reach areas. After cleaning, allow the gimbal to fully dry before operating the drone.
Drone Storage and Transportation Best Practices
Proper storage and transportation are critical to protect the gimbal from damage during transit or when not in use. Always store your drone in a protective case designed to accommodate its size and weight. The case should provide cushioning to absorb shocks and vibrations, preventing damage to the gimbal’s delicate mechanics. When transporting your drone, avoid placing heavy objects on top of the case. During travel, maintain the drone in an upright position to prevent stress on the gimbal. Avoid exposing the drone to extreme temperatures or direct sunlight, which can negatively impact the gimbal’s performance and longevity.
Preflight Gimbal Checks
Before each flight, perform a thorough pre-flight check of the gimbal to ensure it’s functioning correctly. This involves visually inspecting the gimbal for any visible damage or debris. Then, power on the drone and carefully observe the gimbal’s movement. Check for any unusual noises, vibrations, or jerky movements. Ensure that the gimbal is properly balanced and that the camera is securely mounted. If any issues are detected, address them before attempting a flight to prevent potential damage or accidents. A quick checklist could include: visually inspecting for damage, checking for smooth rotation, verifying camera security, and confirming balance.
Firmware Updates
Updating your drone and gimbal’s firmware is crucial for maintaining optimal performance and stability. Firmware updates often include bug fixes, performance improvements, and new features that can enhance the gimbal’s functionality. Check your drone manufacturer’s website regularly for the latest firmware updates. Follow the manufacturer’s instructions carefully when updating the firmware, ensuring a stable power supply throughout the process. Outdated firmware can lead to instability, malfunctions, and even gimbal failure. Regular updates are essential for ensuring your drone operates at its peak performance and has access to the latest improvements in stability and functionality.
Selecting Appropriate Gimbal Settings
Adjusting gimbal settings based on flight conditions is essential for maintaining smooth, stable footage. In windy conditions, increasing the gimbal’s damping settings can help reduce the impact of wind gusts. In extremely cold or hot temperatures, the gimbal’s performance can be affected. Consult your drone’s manual for recommended gimbal settings under various temperature conditions. For example, you may need to reduce the gimbal’s speed in extremely cold weather to prevent motor strain. Adapting your settings to the specific environment ensures optimal performance and minimizes the risk of damage.
Final Conclusion
Mastering the art of drone gimbal maintenance is key to capturing breathtaking aerial footage. By understanding the causes of gimbal drift and motor issues, and by implementing the preventative measures discussed, you can significantly improve the longevity and performance of your drone’s gimbal. Remember, regular maintenance and proactive troubleshooting are your best allies in achieving consistently smooth and professional-looking videos.