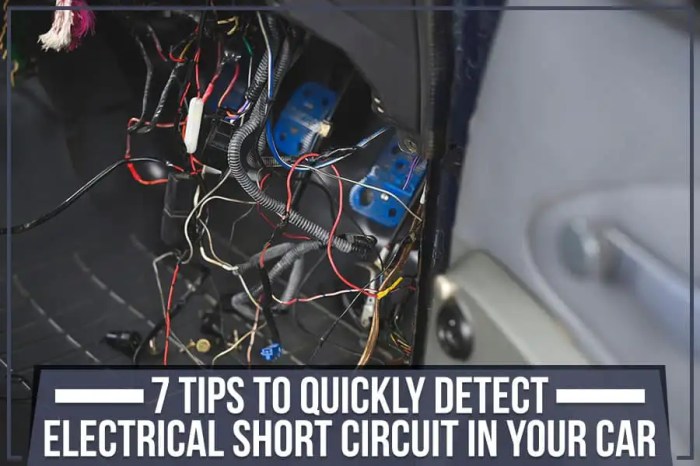
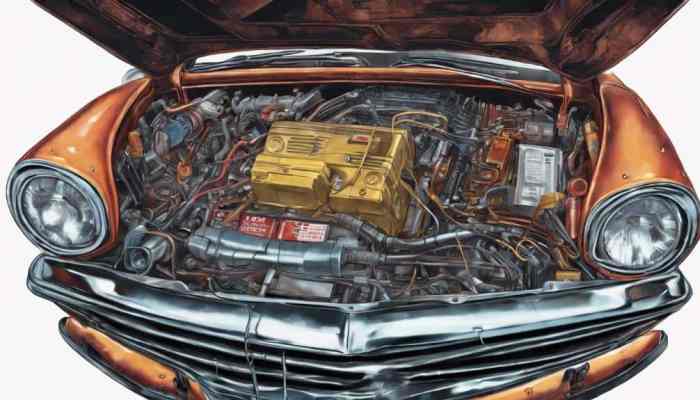
Restoring a classic car is a labor of love, but electrical gremlins can quickly derail your project. This guide provides a concise, yet comprehensive approach to diagnosing and resolving eight common electrical issues found in classic vehicles. We’ll cover everything from simple troubleshooting techniques to more advanced repairs, all within a 15-minute timeframe, enabling you to get back on the road swiftly and efficiently. Whether you’re a seasoned mechanic or a novice enthusiast, this guide offers practical solutions and clear explanations to help you conquer those frustrating electrical problems.
We’ll explore the most frequent electrical problems, providing detailed descriptions of their symptoms, potential causes, and step-by-step troubleshooting steps, supported by visual aids such as illustrative diagrams and tables. We’ll also demonstrate quick fixes for minor issues, explaining the proper use of a multimeter for accurate diagnosis. Finally, we’ll briefly touch upon more advanced diagnostics and repairs, offering a comparison between simpler and more complex solutions.
Common Electrical Problems in Classic Cars

Classic car electrical systems, while charmingly antiquated, can present unique challenges. Understanding the most common issues and their causes is key to keeping your vintage vehicle running smoothly. This section Artikels five frequent problems, their symptoms, likely causes, and effective troubleshooting steps.
Five Frequent Electrical Issues and Their Resolution
Classic car electrical systems, often simpler than modern counterparts, can still suffer from a range of issues. These problems are often exacerbated by age, wear, and the use of less robust components compared to modern vehicles. Understanding these issues is crucial for effective troubleshooting and repair.
| Problem | Symptoms | Potential Causes | Troubleshooting Steps |
|---|---|---|---|
| Dim or Inoperative Headlights | Headlights are weak or fail to illuminate; sometimes only one headlight is affected. Dashboard lights may also be dim. | Loose or corroded connections at the headlight switch, bulbs, or wiring harness; faulty headlight switch; blown fuse; failing battery; corroded ground connections. | Visually inspect all wiring and connections related to the headlights, focusing on the switch, bulbs, and ground points. A simple diagram showing the headlight circuit would be useful here. Check the fuse with a multimeter (a picture showing the correct way to use a multimeter on a fuse would be helpful). Test the battery voltage. Clean and tighten all connections. Replace any faulty components. |
| Intermittent Electrical Issues | Random failures of various electrical components, such as turn signals, wipers, or radio. These issues may appear and disappear unpredictably. | Loose or corroded connections in the wiring harness; damaged wiring insulation causing shorts or intermittent connections; failing ignition switch; worn-out components. | A detailed diagram of the car’s wiring harness would aid in systematically checking connections. Carefully inspect all wiring for damage, paying attention to areas subject to vibration or movement. Use a multimeter to check continuity in suspect wiring sections. Replace any damaged wiring or components. |
| Dead Battery | The car fails to start; battery terminals may show signs of corrosion. | Parasitic drain (current draw even when the car is off); faulty alternator; corroded battery terminals; old or failing battery. | A visual aid depicting how to use a multimeter to measure battery voltage and current draw would be useful. Check the battery terminals for corrosion and clean them. Measure the battery voltage. Test the alternator output. Measure the parasitic draw by disconnecting the battery and measuring the current flow. Replace the battery if necessary. |
| Non-functional Turn Signals | Turn signal lights do not flash; hazard lights may or may not work. | Blown fuse; faulty turn signal switch; damaged wiring; burnt-out bulbs; faulty flasher unit. | Check the fuse associated with the turn signals. A close-up image of a fuse box with labels would help locate the correct fuse. Inspect the turn signal switch and wiring for damage. Test the bulbs. Replace the flasher unit if necessary. A schematic of the turn signal circuit would be beneficial. |
| Inoperative Horn | The horn does not sound when the steering wheel button is pressed. | Blown fuse; faulty horn relay; corroded or damaged wiring; faulty horn itself; bad horn button or its wiring. | Check the fuse for the horn circuit. Inspect the wiring harness connecting the steering wheel horn button to the horn relay and horn. Test the horn relay and horn using a multimeter. A simple circuit diagram of the horn system would be helpful. Replace faulty components. |
Quick Fixes and Troubleshooting Techniques
Addressing minor electrical issues promptly can prevent larger, more complex problems down the line. Quick fixes often involve simple checks and repairs, saving time and potentially expensive professional repairs. Understanding basic troubleshooting techniques is crucial for any classic car owner. This section will Artikel three common quick fixes and explain the use of a multimeter for more in-depth diagnosis.
Three Common Quick Fixes for Minor Electrical Problems
Minor electrical problems in classic cars are often easily solved with a little patience and the right tools. These quick fixes can save you time and money, preventing the need for more extensive repairs. Always remember to disconnect the battery’s negative terminal before working on any electrical components to prevent shocks and short circuits.
- Loose Connections: A surprisingly common cause of electrical issues is loose or corroded connections.
- Visually inspect all wire connections, paying close attention to terminals and connectors, especially those that have been exposed to the elements.
- Tighten any loose screws or terminal clamps. Use appropriate tools to avoid damaging the connections.
- Clean corroded connections with a wire brush and/or contact cleaner. Apply dielectric grease to prevent future corrosion.
- Reconnect the battery’s negative terminal and test the affected electrical component.
- Blown Fuses: Fuses protect circuits from overloads. A blown fuse will interrupt the circuit.
- Locate the fuse box and identify the fuse associated with the malfunctioning component. Consult your car’s wiring diagram if necessary.
- Carefully remove the suspected blown fuse using fuse pullers or tweezers.
- Inspect the fuse for a broken filament. If the filament is broken, replace it with a fuse of the same amperage rating. Never replace a fuse with one of a higher amperage rating.
- Reconnect the battery’s negative terminal and test the affected electrical component.
- Faulty Switches: Worn-out or damaged switches are another frequent source of electrical problems.
- Locate the switch controlling the malfunctioning component.
- Carefully inspect the switch for any visible damage, such as cracks or broken components.
- Try cleaning the switch contacts with contact cleaner. If the problem persists, the switch may need replacement.
- Reconnect the battery’s negative terminal and test the affected electrical component. If the problem persists, switch replacement is necessary.
Multimeter Usage in Electrical Fault Diagnosis
A multimeter is an indispensable tool for diagnosing more complex electrical faults. It allows for precise measurements of voltage, current, and resistance.
Understanding the readings is crucial. For example, a reading of 0 volts across a component that should have 12 volts indicates a lack of power. A low resistance reading where a high resistance is expected may indicate a short circuit. Conversely, an infinitely high resistance reading (open circuit) suggests a broken wire or component. Always ensure the multimeter is set to the correct range and that the probes are correctly connected before taking measurements. Incorrect usage can damage the meter or even lead to injury. For instance, measuring current incorrectly can blow a fuse within the multimeter itself.
Troubleshooting Flowchart for Classic Car Electrical Systems
A systematic approach is essential for efficient troubleshooting. The following flowchart Artikels a logical sequence of steps to diagnose electrical problems. Remember safety first: always disconnect the battery’s negative terminal before commencing any testing.
[Imagine a flowchart here. The flowchart would start with “Electrical Problem Detected?” A “Yes” branch would lead to “Check Fuses,” then to “Check Connections,” then to “Check Switches,” then to “Check Wiring,” and finally to “Consult Wiring Diagram/Seek Professional Help.” A “No” branch would lead to “System Operational.”] The flowchart visually guides the user through a step-by-step diagnostic process. Each step provides a clear direction based on the previous results. This structured approach ensures a comprehensive and efficient troubleshooting process.
Advanced Diagnostics and Repairs (if time allows)
While many classic car electrical issues can be resolved with basic troubleshooting, some problems require more advanced diagnostic techniques and specialized tools. These more complex repairs often involve deeper understanding of electrical systems and potentially dangerous voltages. This section will explore some of these challenges and provide a glimpse into their solutions.
Identifying Advanced Electrical Problems
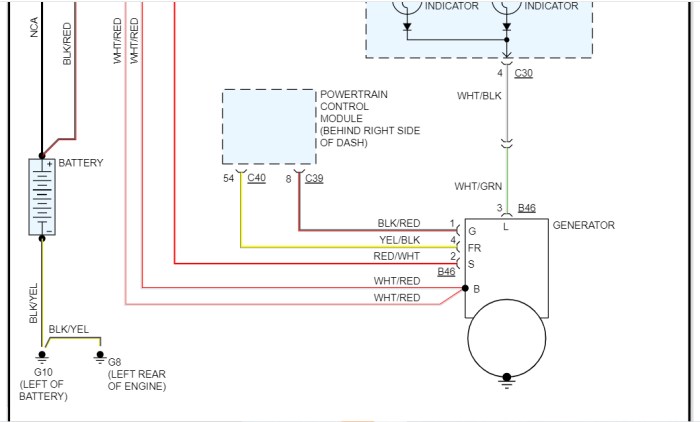
Three advanced electrical problems frequently encountered in classic cars are alternator failure, faulty wiring harnesses, and intermittent electrical gremlins stemming from poor connections or corroded components. These issues differ significantly from simpler problems like blown fuses or bad bulbs, demanding a more systematic and in-depth approach to diagnosis and repair. Simple fixes often involve visual inspection and direct component replacement; advanced problems require the use of multimeters, wiring diagrams, and a strong understanding of automotive electrical principles.
Comparing Repair Procedures
Repairing a faulty alternator, for example, is considerably more complex than replacing a blown fuse. A blown fuse is a straightforward visual check and replacement, while diagnosing alternator failure involves testing voltage output, checking for continuity in the charging circuit, and potentially performing load tests. Similarly, identifying the source of an intermittent electrical fault necessitates methodical tracing of wiring harnesses, checking connections, and even employing specialized diagnostic equipment. Troubleshooting a wiring harness problem requires patience and systematic testing to isolate the faulty section, whereas a simple short circuit might be identified visually.
Alternator Replacement
Replacing a faulty alternator requires careful attention to safety precautions. Before beginning, disconnect the battery’s negative terminal to prevent accidental shocks. Necessary tools include a socket wrench set, a multimeter, and possibly a puller for stubborn alternator mounting bolts. The process generally involves removing the alternator’s mounting bolts, disconnecting the electrical connectors (carefully noting their positions), and installing the new alternator in reverse order. Always refer to a wiring diagram specific to your vehicle’s model to ensure correct reconnection. After installation, verify proper charging voltage with a multimeter to confirm the repair’s success. Failure to follow safety procedures could result in serious injury from electrical shock.
Comparison of Wiring Harnesses
| Wiring Harness Type | Advantages | Disadvantages | Common Use in Classic Cars |
|---|---|---|---|
| Original Equipment Manufacturer (OEM) | Correct specification, often readily available for common models. | Can be expensive, potentially brittle or damaged with age. | Many classic car owners prefer to maintain originality. |
| Reproduction | More affordable than OEM, often improves upon original design flaws. | Quality can vary widely, may not be an exact match to the original. | Popular choice for cost-conscious restorations. |
| Custom-Built | Highly customizable to specific needs, can incorporate modern materials. | Requires specialized knowledge and tools, potentially more expensive than reproduction harnesses. | Used for highly modified vehicles or unique restoration projects. |
Final Summary
Conquering your classic car’s electrical woes doesn’t have to be daunting. This guide equips you with the knowledge and practical steps to tackle eight common electrical problems efficiently. By understanding the symptoms, potential causes, and troubleshooting techniques, you can restore your classic car’s electrical system to its former glory. Remember safety first, and always consult a professional if you encounter issues beyond your skill level. With a little patience and the right approach, you can enjoy the open road in your beautifully restored classic car.