Keeping your RV’s cooling system in top shape is crucial for comfortable travel, especially during warmer months. A malfunctioning system can quickly turn a relaxing trip into a roadside emergency. This guide provides a comprehensive, step-by-step approach to diagnosing and resolving seven common RV cooling system problems. We’ll walk you through an eleven-step diagnostic procedure, offering practical solutions and preventative maintenance tips to keep your RV running cool and reliable.
From identifying subtle leaks to understanding the intricacies of your RV’s cooling system components, this guide empowers you to tackle common issues with confidence. We’ll cover everything from identifying the source of a coolant leak to understanding the role of the radiator and thermostat. With clear instructions and helpful visuals, you’ll be equipped to maintain a properly functioning cooling system, ensuring many miles of worry-free RV adventures.
Identifying RV Cooling System Problems
Maintaining a properly functioning cooling system is crucial for the longevity and safe operation of your RV. Neglecting regular checks and maintenance can lead to costly repairs and even catastrophic engine failure. Understanding common cooling system problems and how to diagnose them is a vital skill for every RV owner.
Seven Common RV Cooling System Problems
Several issues can plague an RV’s cooling system, ranging from relatively minor inconveniences to major mechanical failures. These problems often stem from a combination of factors, including the age of the vehicle, the frequency of use, and the diligence of preventative maintenance. Early detection and prompt action are key to preventing larger, more expensive repairs.
Low Coolant Level
Low coolant levels are a frequent problem, often caused by leaks in the radiator, hoses, water pump, or engine block. Age and wear and tear on hoses and seals are common culprits. Insufficient coolant can lead to overheating and engine damage. Regular visual inspections of the coolant reservoir are essential. A slow leak might only be detectable through consistent monitoring of the coolant level over time. For example, a small crack in a hose might only leak a small amount of coolant each day, leading to a gradual decrease in the coolant level that goes unnoticed until it becomes significant.
Coolant Leaks
Coolant leaks manifest in various ways, from obvious streams of coolant to subtle dampness around components. Causes include deteriorated hoses, cracked radiators, failed water pumps, and damaged head gaskets. The severity of a leak dictates the urgency of repair. A large leak requires immediate attention to prevent engine overheating, while a small leak might warrant a more gradual approach to repair. Identifying the source of the leak is crucial for effective repair. For instance, a leak originating from a cracked radiator may require radiator replacement, whereas a leaking hose might only require hose replacement.
Overheating
Overheating is a critical problem, often stemming from low coolant levels, coolant leaks, a faulty thermostat, a clogged radiator, or a malfunctioning water pump. Prolonged overheating can cause severe engine damage, including warped cylinder heads and cracked engine blocks. Monitoring the engine temperature gauge is essential. A sudden spike in temperature demands immediate action, such as pulling over and allowing the engine to cool down. Ignoring overheating can lead to costly engine repairs or even replacement.
Faulty Thermostat
The thermostat regulates coolant flow, preventing overheating. A faulty thermostat, either stuck open or closed, can disrupt this regulation. A thermostat stuck closed prevents coolant circulation, leading to overheating. Conversely, a thermostat stuck open allows coolant to constantly circulate, potentially leading to insufficient engine warming in cold weather. A simple thermostat replacement often resolves this issue. For example, a stuck-closed thermostat on a cold morning might lead to poor engine performance and a long warm-up period.
Clogged Radiator
A radiator clogged with debris restricts coolant flow, leading to overheating. This is more common in areas with dusty or dirty conditions. Regular cleaning or flushing of the radiator is preventative maintenance. Failure to address a clogged radiator can result in engine overheating and damage. For instance, an RV that frequently travels on dusty roads may require more frequent radiator flushing to prevent clogging.
Faulty Water Pump
The water pump circulates coolant through the engine. A malfunctioning water pump, due to wear or bearing failure, will impair coolant circulation and cause overheating. A leaking or seized water pump requires immediate replacement. A failing water pump often exhibits unusual noises or leaks, providing early warning signs. For example, a whining noise from the water pump area is a clear indication of potential failure and the need for prompt replacement.
Radiator Fan Problems
The radiator fan assists in cooling the coolant. A malfunctioning fan, whether due to a faulty motor, wiring issues, or a broken fan blade, reduces cooling efficiency, leading to overheating, especially in hot weather or during idling. Testing the fan’s operation and addressing any electrical or mechanical problems is vital for preventing overheating. For instance, a malfunctioning fan relay can prevent the fan from operating, even if the fan motor itself is functioning correctly.
RV Cooling System Diagnostic Flowchart
| Problem | Step 1 | Step 2 | Step 3 |
|---|---|---|---|
| Low Coolant Level | Check coolant reservoir level. | Inspect hoses and connections for leaks. | Pressure test cooling system for leaks. |
| Coolant Leaks | Visually inspect entire cooling system for leaks. | Pressure test cooling system to pinpoint leak location. | Repair or replace leaking components. |
| Overheating | Check coolant level. | Check for leaks. | Check thermostat, radiator, water pump, and fan operation. |
| Faulty Thermostat | Test thermostat in boiling water. | Replace thermostat if faulty. | Verify proper coolant temperature after replacement. |
| Clogged Radiator | Inspect radiator for debris. | Flush radiator with appropriate cleaner. | Check for improved coolant flow. |
| Faulty Water Pump | Listen for unusual noises from water pump. | Check for leaks around water pump. | Replace water pump if necessary. |
| Radiator Fan Problems | Check fan operation manually. | Inspect fan motor, wiring, and relay. | Repair or replace faulty components. |
Eleven-Step Diagnostic Procedure
A systematic approach is crucial for efficiently diagnosing RV cooling system problems. This eleven-step diagnostic procedure provides a structured methodology, guiding you through a comprehensive inspection to pinpoint the source of any cooling issues. Following these steps will help you identify the problem quickly and accurately, minimizing downtime and potential damage.
This procedure assumes a basic understanding of RV cooling systems. Always consult your RV’s owner’s manual for specific details and safety precautions. Remember to allow the engine to cool completely before starting any inspection.
Coolant Level Check
Checking the coolant level is the first and simplest step. A low coolant level often indicates a leak.
- Locate the coolant reservoir. (Image: The image shows a translucent plastic reservoir, typically located near the engine compartment, often with markings indicating minimum and maximum fill levels. The reservoir cap is clearly visible, typically colored green or yellow.)
- With the engine cold, carefully remove the reservoir cap, ensuring the system is depressurized.
- Inspect the coolant level. It should be between the minimum and maximum lines. If low, add coolant of the correct type as specified in your RV’s manual. Do not overfill.
Visual Inspection for Leaks
A visual inspection can quickly reveal external leaks.
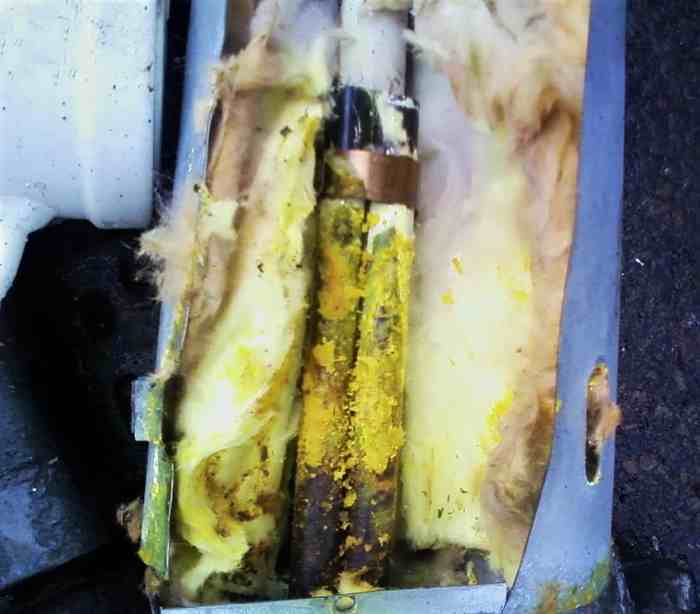
- Carefully examine all hoses, clamps, and connections for any signs of leaks, such as wet spots, stains, or dripping coolant. (Image: The image shows a close-up of various hoses and connections, highlighting potential leak points such as cracks in hoses, loose clamps, and corroded connections.)
- Check the radiator, engine block, water pump, and heater core for any signs of leaks. Look for rust or corrosion, which can indicate potential weak points. (Image: The image shows a wider view of the engine compartment, highlighting the radiator, water pump, and engine block, with arrows pointing to potential leak areas.)
- Pay close attention to areas where hoses connect to the engine and radiator, as these are common leak points. (Image: A zoomed-in image focusing on a hose connection, showing a possible leak at the clamp.)
Radiator Pressure Test
A pressure test helps detect leaks within the radiator and cooling system under pressure.
- Use a radiator pressure tester. (Image: The image depicts a radiator pressure tester, showing its components and how it connects to the radiator cap.)
- Follow the manufacturer’s instructions for the pressure tester. This usually involves attaching the tester to the radiator cap and pumping it up to the specified pressure.
- Observe the gauge for pressure loss, indicating a leak. Note the location of any leaks observed. (Image: An image showing the pressure tester gauge indicating a pressure drop, with arrows pointing to the leak location observed.)
Thermostat Check
A malfunctioning thermostat can prevent proper coolant flow.
- Remove the thermostat. (Image: An image shows the location of the thermostat housing and the steps to remove it. Tools like a socket wrench are shown.)
- Place the thermostat in a pot of water and heat it gradually. Observe the temperature at which it opens fully. (Image: The image shows a thermostat submerged in water on a stove, with a thermometer indicating the temperature.)
- Compare the opening temperature to the manufacturer’s specifications. If it opens at the wrong temperature, replace it.
Water Pump Inspection
A failing water pump will hinder coolant circulation.
- Inspect the water pump pulley for any play or looseness. (Image: An image shows the water pump pulley and how to check for play by attempting to move it.)
- Listen for any unusual noises coming from the water pump, such as whining or grinding, which might indicate bearing failure. (Image: A schematic diagram of a water pump, highlighting the bearings.)
- Check for leaks around the water pump seal. (Image: An image highlighting the water pump seal and areas where leaks might occur.)
Hose and Clamp Inspection
Inspect hoses for cracks, bulges, or deterioration. Check clamps for tightness.
- Examine all hoses for cracks, bulges, or signs of wear and tear. Replace any damaged hoses. (Image: A close-up image of a deteriorated hose, showing cracks and bulges.)
- Ensure all hose clamps are tight and secure. Tighten or replace any loose or damaged clamps. (Image: An image showing the correct way to tighten a hose clamp using a screwdriver.)
Radiator Inspection
Check the radiator for damage, leaks, or blockages.
- Inspect the radiator fins for any damage or blockage from debris. Clean any debris gently. (Image: An image showing a radiator with debris lodged in the fins.)
- Check for leaks around the radiator core and end tanks. (Image: An image highlighting potential leak points on the radiator.)
Cooling Fan Operation Check
Verify that the cooling fan is working correctly.
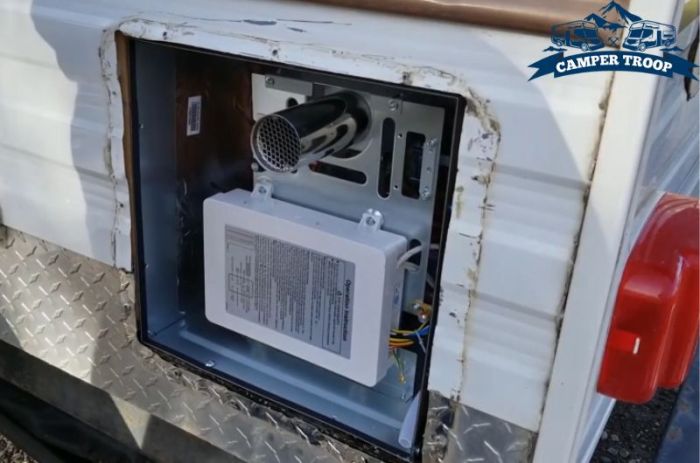
- Start the engine and let it run until the engine reaches operating temperature. (Image: An image depicting an engine running with a temperature gauge showing the operating temperature.)
- Observe whether the cooling fan cycles on and off as expected. If it doesn’t, check the fan relay, fuse, and wiring. (Image: A diagram of the cooling fan system, showing the fan, relay, and fuse.)
Heater Core Check
A leaking heater core can cause coolant loss and interior dampness.
- Inspect the heater core for leaks. This may involve checking for leaks under the dash, often requiring partial disassembly. (Image: A diagram showing the location of the heater core within the dashboard.)
- Look for moisture or a sweet smell inside the RV, which may indicate a leak. (Image: A picture highlighting areas where moisture might accumulate in the RV cabin due to a heater core leak.)
System Flush and Refill
If no leaks are found, a system flush might be necessary to remove any contaminants.
- Drain the coolant completely. (Image: An image showing the drain plug location on the radiator or engine block.)
- Flush the system with clean water to remove any sediment or debris. (Image: A diagram illustrating the process of flushing the cooling system.)
- Refill the system with the correct type and amount of coolant. (Image: An image showing the process of refilling the coolant reservoir.)
Solutions and Preventative Maintenance

Addressing RV cooling system problems effectively requires understanding both immediate solutions and long-term preventative measures. This section details solutions for the seven common problems previously identified, comparing repair methods, and offering preventative maintenance strategies to minimize future issues and extend the lifespan of your RV’s cooling system.
Solutions for Common RV Cooling System Problems
The solutions for each problem vary in complexity and cost, depending on the specific cause and the extent of the damage. Simple fixes might involve tightening a loose hose clamp, while more significant issues could necessitate replacing a radiator or water pump. Always prioritize safety and, if unsure about any repair, consult a qualified RV mechanic.
Low Coolant Level Solutions
Low coolant levels often stem from leaks. Solutions involve identifying the leak’s source (e.g., a cracked hose, faulty radiator, or leaking water pump) and repairing or replacing the damaged component. Simple leaks can be fixed with sealant or hose clamps; more significant leaks require part replacement. Refilling the system with the correct coolant/water mixture is crucial after repairs. Using a pressure tester helps pinpoint leaks.
Coolant Leaks Solutions
Repairing coolant leaks depends on their location and severity. Small leaks in hoses might be patched with a specialized sealant or repaired by replacing the damaged hose section. Larger leaks, often in the radiator or water pump, require replacing the faulty component. Welding might be an option for certain radiator leaks, but it’s usually a more expensive and less reliable solution than replacement.
Overheating Solutions
Overheating can result from various issues: low coolant, a faulty thermostat, a clogged radiator, or a malfunctioning water pump. Solutions involve addressing the underlying cause. A faulty thermostat requires replacement. A clogged radiator may need flushing or replacement. A failing water pump necessitates replacement. Proper coolant levels are essential.
Faulty Thermostat Solutions
A malfunctioning thermostat, either stuck open or closed, prevents the engine from reaching optimal operating temperature. The solution is straightforward: replace the thermostat with a new one of the correct specifications for your RV’s engine. This is a relatively inexpensive repair that usually requires basic mechanical skills.
Clogged Radiator Solutions
A clogged radiator restricts coolant flow, leading to overheating. Solutions include flushing the radiator with a specialized cleaner to remove debris and scale buildup. If flushing is ineffective, radiator replacement might be necessary. Regular flushing as part of preventative maintenance is highly recommended.
Water Pump Failure Solutions
A failing water pump prevents coolant circulation, causing overheating. The only solution is to replace the water pump. This is a more involved repair, often requiring specialized tools and some mechanical expertise. Ignoring a failing water pump can lead to catastrophic engine damage.
Faulty Fan or Fan Clutch Solutions
A malfunctioning cooling fan or fan clutch prevents adequate heat dissipation. A non-functional fan requires replacement. A faulty fan clutch might be repairable or require replacement, depending on the specific issue. This repair requires some mechanical skills and access to replacement parts.
Preventative Maintenance Table
| Problem | Prevention Method | Frequency | Estimated Cost |
|---|---|---|---|
| Low Coolant Level | Regular coolant level checks; inspect hoses and connections for leaks | Monthly | $0 – $20 (coolant) |
| Coolant Leaks | Regular visual inspections of hoses, radiator, and water pump; pressure testing | Semi-annually | Variable, depending on repair |
| Overheating | Regular coolant flushes; maintain proper coolant level; inspect thermostat | Annually | Variable, depending on repair |
| Faulty Thermostat | Regular inspection and replacement as needed | Every 2-3 years | $20 – $50 (thermostat and labor) |
| Clogged Radiator | Regular radiator flushes | Annually | $30 – $100 (flush and labor) |
| Water Pump Failure | Regular visual inspection; listen for unusual noises | Inspect during other maintenance | $100 – $300 (pump and labor) |
| Faulty Fan or Fan Clutch | Regular inspection; check for proper fan operation | Annually | Variable, depending on repair |
Ultimate Conclusion
Mastering the art of RV cooling system maintenance is key to a smooth and enjoyable travel experience. By following the eleven-step diagnostic procedure Artikeld in this guide, you’ll gain the skills to quickly identify and address common cooling system issues. Remember, preventative maintenance is just as important as reactive repairs. By regularly checking your coolant levels, inspecting hoses and belts, and addressing minor problems promptly, you can significantly extend the lifespan of your RV’s cooling system and avoid costly breakdowns. Hit the road with confidence, knowing you’re prepared to handle whatever your RV’s cooling system throws your way.