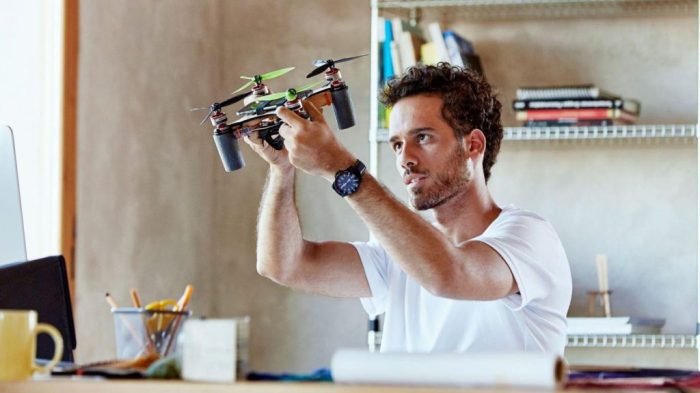
Capturing stunning aerial footage with your drone can be incredibly rewarding, but technical difficulties can quickly turn a dream shoot into a frustrating experience. This guide tackles three prevalent drone camera issues: poor video quality, gimbal malfunctions, and storage/transfer problems. We’ll provide practical solutions and preventative measures to ensure your next flight results in breathtaking, high-quality video.
From understanding the impact of lighting and camera settings on video clarity to mastering gimbal calibration and implementing secure data management strategies, this comprehensive guide equips you with the knowledge to overcome common obstacles and elevate your drone photography and videography to the next level. We’ll explore troubleshooting techniques, preventative maintenance, and best practices for optimizing your workflow, ensuring you spend less time problem-solving and more time creating.
Poor Video Quality

Grainy, blurry drone footage can be incredibly frustrating, especially when you’re trying to capture stunning visuals. Several factors contribute to poor video quality, ranging from simple user errors to more complex technical issues. Understanding these factors and implementing the correct adjustments can significantly improve the clarity and overall aesthetic appeal of your drone videos.
Blurry or grainy drone footage often stems from issues with the camera settings, lighting conditions, or even the drone’s stability. Low light conditions can lead to grainy footage due to the camera’s increased sensitivity, while incorrect exposure settings can result in either overexposed (too bright) or underexposed (too dark) videos. Furthermore, issues like improper focus or a shaky camera can contribute to blurry footage. Let’s delve into how to address these issues.
Adjusting Drone Camera Settings for Improved Clarity
Improving video clarity often begins with optimizing your drone’s camera settings. The key settings to adjust include ISO, shutter speed, and aperture. A step-by-step approach is recommended for optimal results.
- Check your ISO: A lower ISO (e.g., 100-200) generally results in cleaner footage with less grain, but requires more light. Higher ISO values (e.g., 800 and above) increase sensitivity to light, reducing blur in low light but increasing grain. Experiment to find the best balance for your lighting conditions.
- Adjust your Shutter Speed: The shutter speed should ideally be double your frame rate (e.g., 1/50th of a second for 25fps). This helps avoid motion blur. Faster shutter speeds are useful in bright conditions, while slower speeds might be needed in low light, though this increases the risk of motion blur.
- Optimize Aperture: Aperture controls the amount of light entering the camera. A wider aperture (smaller f-number, e.g., f/2.8) lets in more light, which is beneficial in low-light situations, but can reduce depth of field. A narrower aperture (larger f-number, e.g., f/8) increases depth of field but requires more light.
- Focus your Camera: Ensure your camera is properly focused on your subject. Many drones offer autofocus, but manual focus might be necessary for optimal results, especially in complex scenes.
- Check your Video Resolution: Higher resolutions (like 4K) produce sharper videos but require more storage space and processing power. Choosing a resolution appropriate to your needs and your drone’s capabilities is essential.
Optimizing Lighting Conditions for Better Video Quality
Lighting plays a crucial role in video quality. Proper lighting minimizes grain and enhances details.
Avoid shooting directly into the sun, as this can cause lens flare and overexposure. The ideal time to shoot is during the “golden hour” (sunrise and sunset) for soft, warm lighting. Cloudy days offer diffused light that’s excellent for consistent exposure. If shooting in low-light conditions, consider using external lighting sources such as LED panels or reflectors to illuminate your subject.
Video Resolution Comparison
The choice of video resolution significantly impacts file size and quality. Higher resolutions offer greater detail but demand more storage space.
| Resolution | File Size | Quality | Notes |
|---|---|---|---|
| 720p (HD) | Small | Good | Suitable for smaller screens and online sharing |
| 1080p (Full HD) | Medium | Excellent | A good balance between quality and file size |
| 4K (Ultra HD) | Large | Exceptional | Best for large screens and detailed viewing, but requires significant storage |
| 2.7K | Medium-Large | Very Good | A compromise between 1080p and 4K |
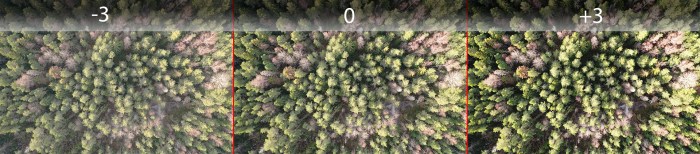
Effects of Filters and Color Grading
Filters and color grading can significantly enhance the visual appeal of your drone footage, but improper use can negatively impact quality.
Filters can add creative effects, but excessive use can reduce clarity and introduce artifacts. Color grading allows for adjustments to color balance, contrast, and saturation. Subtle adjustments usually yield the best results. Over-processing can lead to a washed-out or unnatural look. Experimentation and a keen eye for detail are crucial for achieving a professional-looking result. Start with minimal adjustments and gradually refine your settings until you achieve the desired look.
Gimbal Issues
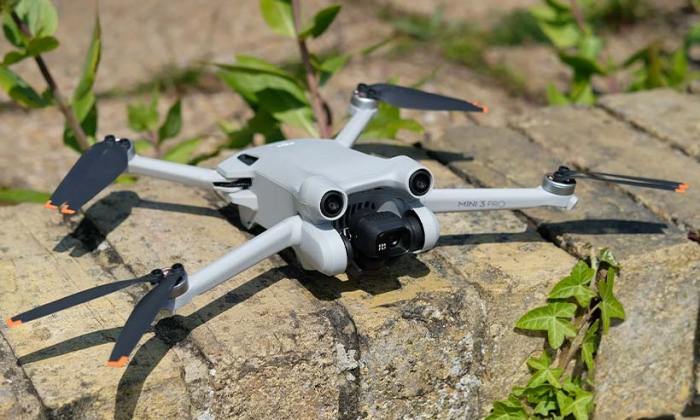
A malfunctioning gimbal can significantly impact the quality of your drone footage, resulting in shaky, unusable video. Understanding the signs of gimbal problems and knowing how to troubleshoot them is crucial for capturing smooth, professional-looking aerial shots. This section will cover identifying gimbal malfunctions, calibration techniques, and preventative maintenance to keep your gimbal performing at its best.
Gimbal Malfunctions and Calibration
Identifying Gimbal Malfunctions
Several signs indicate a problem with your drone’s gimbal. These include noticeable shaking or jerky movements in the footage, inconsistent camera orientation, the camera failing to remain level during flight, and unusual noises emanating from the gimbal itself. A gimbal that struggles to keep the camera steady, even in calm conditions, is a clear indication of a potential issue. These problems can stem from various causes, ranging from simple miscalibration to more serious mechanical problems.
Calibrating a Drone Gimbal
Calibrating your gimbal is a straightforward process that often resolves minor issues. Most drone manufacturers provide detailed instructions within their app or user manuals. Generally, the process involves powering on the drone with the propellers off, navigating to the gimbal settings within the drone’s control app, and then following the on-screen prompts to initiate the calibration sequence. This usually involves carefully leveling the drone and allowing the gimbal to self-adjust. A successful calibration will result in smoother, more stable video footage.
Troubleshooting Common Gimbal Problems
If calibration doesn’t resolve the issue, further troubleshooting may be necessary. Shaking or jerky movements could be caused by loose screws, a damaged gimbal motor, or software glitches. Inspect the gimbal for any visible damage. If you find loose screws, tighten them carefully. If the problem persists, updating the drone’s firmware might resolve software-related issues. For more severe problems, contacting the drone manufacturer’s support team is recommended. They can provide more specific guidance based on your drone model and the nature of the problem.
Preventative Measures for Gimbal Longevity
Proper maintenance significantly extends the lifespan of your drone’s gimbal.
- Always power down your drone properly before disconnecting the battery or transporting it.
- Avoid subjecting the drone to extreme temperatures or harsh weather conditions.
- Regularly inspect the gimbal for any loose screws or signs of damage.
- Clean the gimbal gently using a soft brush to remove any dust or debris.
- Store your drone in a protective case when not in use to prevent accidental damage.
These simple steps can prevent many common gimbal problems.
Proper Storage and Transportation
Protecting your drone during storage and transport is essential to prevent gimbal damage. Always store your drone in a case designed specifically for its model. This will cushion it against bumps and impacts during transit. Avoid placing heavy objects on top of the case. When transporting the drone by air, consider using a hard-shell case to provide maximum protection against potential damage from baggage handling. Properly securing the drone within its case will minimize the risk of internal components, including the delicate gimbal, becoming damaged during transportation.
Storage and Transfer Problems
Losing valuable drone footage due to storage or transfer issues is a frustrating experience. Efficient and secure storage practices, coupled with reliable transfer methods, are crucial for preserving your aerial photography and videography. This section will explore various options for storing and transferring your drone footage, highlighting best practices to prevent data loss and ensure the longevity of your work.
Drone Footage Storage Methods
Choosing the right storage method depends on your needs and budget. Several options exist, each with its own advantages and disadvantages. Consider factors like storage capacity, accessibility, security, and cost when making your decision.
- SD Cards: SD cards are the most common storage method for drones. They offer portability and are relatively inexpensive. However, they have limited storage capacity and are susceptible to physical damage or data corruption. Regularly formatting your SD card and using a high-quality, reputable brand can mitigate some of these risks.
- External Hard Drives: External hard drives provide significantly more storage capacity than SD cards at a relatively low cost. They are also easily portable and can be backed up to a cloud service for added security. However, they are still susceptible to physical damage and can fail, leading to data loss. Consider using a ruggedized external hard drive for increased durability.
- Cloud Storage: Cloud storage services, such as Google Drive, Dropbox, or iCloud, offer a convenient way to store and access your footage from anywhere with an internet connection. They also provide a level of redundancy and protection against data loss. However, cloud storage can be expensive, especially for large video files, and requires a reliable internet connection.
Transferring Large Video Files
Transferring large video files from your drone’s SD card to your computer requires careful consideration to prevent data loss. The speed of the transfer will depend on the size of the files, the speed of your computer’s ports, and the speed of your SD card reader.
- Use a reliable card reader: A fast and reliable SD card reader is essential for efficient and safe transfer. Avoid using the built-in SD card reader on your laptop as it may be slower and less reliable.
- Direct connection is best: Connect your SD card reader directly to your computer using a USB cable. Avoid using USB hubs as they can sometimes introduce instability.
- Verify file integrity after transfer: After transferring the files, verify their integrity by checking the file sizes and playing back short segments of the video to ensure no data corruption occurred during the transfer.
- Avoid interrupting the transfer: Do not disconnect the SD card or interrupt the transfer process while it’s in progress, as this could lead to data corruption or loss.
Backing Up Drone Footage
Backing up your drone footage is crucial for preventing data loss. A multi-layered backup strategy is recommended to ensure the safety of your valuable files.
- Immediate copy: Immediately after transferring your footage from the SD card to your computer, create a copy on a separate external hard drive.
- Cloud backup: Upload a copy of your footage to a cloud storage service. This provides an additional layer of protection against data loss due to hardware failure or theft.
- Offsite backup: Consider storing a backup copy of your footage offsite, such as at a friend’s house or in a safe deposit box. This protects against loss due to fire, theft, or other local disasters.
Appropriate File Formats for Drone Footage
Using the appropriate file format can significantly impact the quality and size of your drone footage.
Using lossless formats like ProRes or DNxHR preserves maximum image quality but results in larger file sizes. Lossy formats like H.264 or H.265 offer smaller file sizes but may result in some quality loss. The choice depends on your priorities.
Epilogue
Mastering your drone camera isn’t just about technical proficiency; it’s about understanding the interplay of settings, equipment maintenance, and data management. By addressing poor video quality, gimbal issues, and storage challenges proactively, you can significantly improve the quality and reliability of your aerial footage. This guide provides the foundational knowledge and practical steps to transform your drone operation from troubleshooting to creation, allowing you to focus on capturing stunning visuals and sharing your unique perspective with the world.