Achieving perfect first-layer adhesion is crucial for successful 3D printing. Frustration often arises from common issues like a warped bed, insufficient adhesion, or improper leveling. This guide tackles these prevalent problems, offering practical solutions and preventative measures to ensure your prints stick flawlessly every time. We’ll explore the root causes, provide detailed troubleshooting steps, and equip you with the knowledge to conquer these challenges.
From understanding the nuances of different bed materials and their responses to temperature variations to mastering various bed leveling techniques, we’ll provide a comprehensive approach to resolving adhesion issues. This guide will empower you to diagnose problems quickly and effectively, maximizing your 3D printing success rate and minimizing wasted filament.
Warped Bed Surface
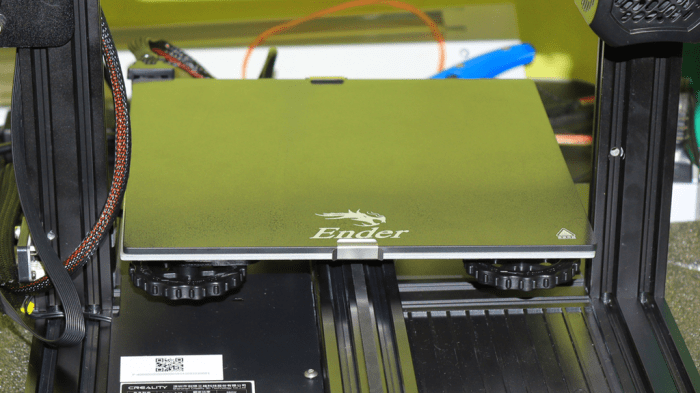
A warped 3D printer bed is a common problem that can significantly impact print quality, leading to adhesion issues, warping, and ultimately, failed prints. Understanding the causes, detection methods, and correction techniques is crucial for successful 3D printing.
Causes of Bed Warping
Several factors contribute to a warped 3D printer bed. The most common include manufacturing imperfections, uneven heating during use, and physical damage from impacts or improper handling. Manufacturing flaws can result in inconsistencies in the bed’s material thickness or flatness. Uneven heating, especially with heated beds, can cause localized expansion and contraction, leading to warping over time. Finally, accidental drops or impacts can physically bend or deform the bed, making it uneven. The material of the bed also plays a significant role; glass and metal beds are less prone to warping than some plastic alternatives.
Detecting Bed Warping
Detecting a warped bed requires careful observation and the use of appropriate tools. Visually inspecting the bed for obvious bends or dips is a first step. However, subtle warping might not be immediately visible. A more accurate method involves using a straight edge, like a metal ruler or a perfectly flat piece of glass, placed across the bed’s surface. Any gaps between the straight edge and the bed indicate warping. Another approach is to use a feeler gauge to measure the distance between the bed and the straight edge at various points. Consistent measurements across the bed’s surface signify a flat bed, while inconsistencies point to warping.
Correcting a Warped Bed
Correcting a warped bed involves a combination of leveling and shimming techniques. Leveling adjusts the bed’s height relative to the nozzle, while shimming physically corrects the bed’s flatness. For minor warping, adjusting the bed leveling screws can often suffice. However, significant warping requires shimming. Shims, typically thin pieces of metal or plastic, are placed under the warped areas of the bed to raise them to the same plane as the rest of the surface. The type of shim material and its thickness should be chosen carefully to ensure stability and avoid creating new problems. It’s crucial to perform bed leveling after shimming to ensure proper nozzle-to-bed distance.
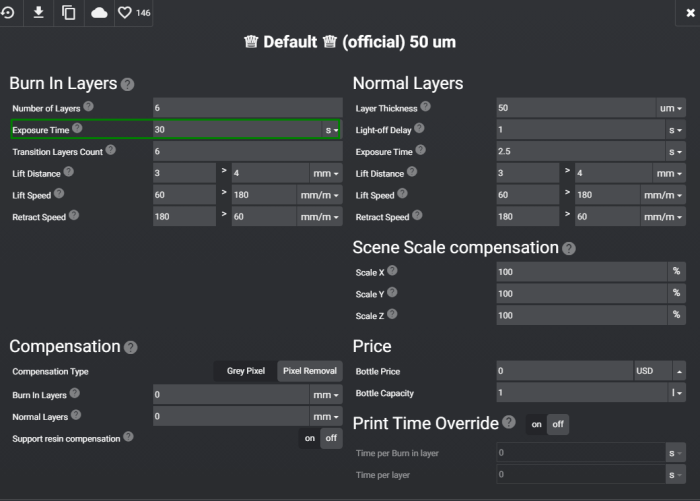
Bed Leveling Methods
The following table compares different bed leveling methods:
| Method | Advantages | Disadvantages | Difficulty |
|---|---|---|---|
| Manual Leveling (with screws) | Simple, requires minimal tools | Can be time-consuming, less precise for significant warping | Easy |
| Auto Bed Leveling (ABL) with probe | Highly accurate, compensates for significant warping | Requires additional hardware and software configuration | Medium |
| Software-assisted Leveling (with mesh bed leveling) | Accounts for unevenness across the entire bed | Requires specific slicer software and may require calibration | Medium |
| Shimming | Corrects significant warping | Requires careful selection of shims and potentially some disassembly | Medium to Hard |
Visual Guide to Warping Issues and Solutions
Imagine a bed with a noticeable dip in the center. This is a common warping issue, often caused by uneven heating. The solution involves placing shims under the center of the bed to raise it to the same level as the edges. Another scenario involves a slight bow along one edge of the bed. This might be corrected by shimming under that specific edge. For a bed with multiple dips and rises, a combination of shimming and careful manual leveling is needed. Remember to always use a straight edge to verify the bed’s flatness after any adjustments. After shimming, carefully re-level the bed using your printer’s leveling procedure to ensure the nozzle is at the correct height above the entire print surface.
Insufficient Bed Adhesion
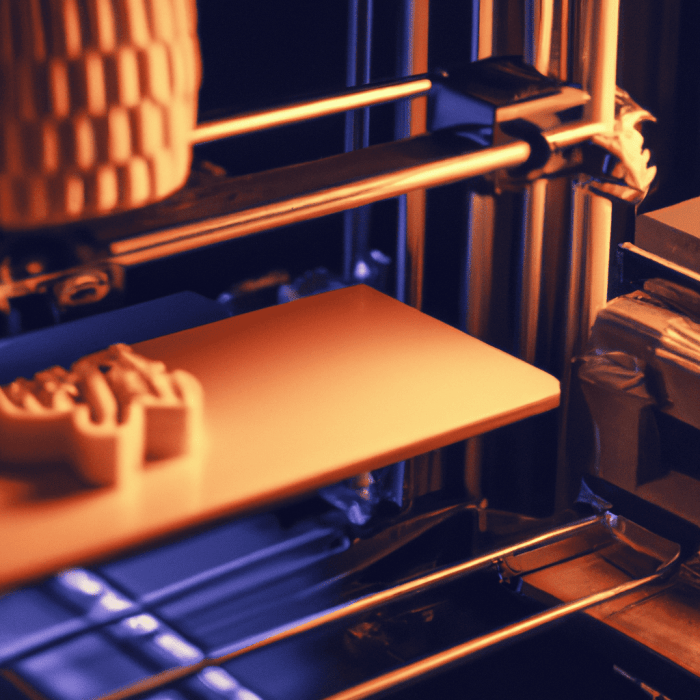
Insufficient bed adhesion, a common 3D printing frustration, occurs when the filament fails to stick properly to the print bed. This results in prints lifting from the bed, warping, or completely failing. Understanding the causes and implementing appropriate solutions is crucial for successful printing.
Materials Prone to Poor Bed Adhesion
Certain filaments are inherently more prone to poor bed adhesion than others. ABS, for example, tends to require more aggressive adhesion solutions due to its higher warping tendency and lower initial adhesion compared to PLA. PETG, while generally easier to print than ABS, can also struggle with adhesion on some surfaces. Flexible filaments, like TPU and TPE, often present the greatest challenge, demanding specialized techniques and adhesives. The lower surface tension of these materials contributes to their difficulty in adhering to the print bed.
Temperature’s Effect on Bed Adhesion
The temperature of both the print bed and the extruder significantly influences bed adhesion. Too low a bed temperature can lead to insufficient melting and bonding of the filament to the bed surface. Conversely, too high a bed temperature might cause the filament to stick too aggressively, resulting in difficulties removing the finished print or even causing the bed to become excessively contaminated with melted filament. PLA generally prints well with a bed temperature between 50-70°C, while ABS typically requires 90-110°C, and PETG often falls within the 60-80°C range. These are guidelines, however, and the optimal temperature will vary depending on the specific filament brand, bed material, and ambient conditions.
Comparison of Bed Adhesion Solutions
Choosing the right bed adhesion solution depends on the filament used and personal preference. Here’s a comparison of common options:
- Glue Stick: A widely used, inexpensive, and easy-to-apply solution. Provides decent adhesion for many filaments, particularly PLA. Requires a thin, even application and may require reapplication for larger prints. Easy cleanup with water.
- Hairspray: Another readily available and relatively inexpensive option. Offers good adhesion, but the type of hairspray (non-aerosol is generally preferred) can impact performance. Can leave residue on the print bed requiring thorough cleaning. Avoid using hairspray containing oils or moisturizers.
- Specialized Adhesives: These are formulated specifically for 3D printing and often offer superior adhesion compared to glue sticks or hairspray. They tend to be more expensive but can significantly improve print success rates, especially with difficult filaments like ABS, PETG, and flexibles. These come in various forms, including liquids, tapes, and sheets.
- BuildTak and similar materials: These are specialized sheets or tapes designed to provide exceptional adhesion. They are often more expensive than other solutions but provide excellent and consistent adhesion for a wide range of filaments, reducing the need for other adhesives. They usually require less frequent cleaning than other methods.
Proper Bed Cleaning Procedure
Maintaining a clean print bed is paramount for consistent adhesion. Here’s a step-by-step cleaning procedure:
- Power Down and Disconnect: Always ensure the printer is completely powered off and disconnected from the power source before cleaning.
- Remove Excess Filament: Carefully remove any residual filament from the print bed using a scraper or spatula. Avoid scratching the surface.
- Initial Cleaning: For glue stick residue, use warm water and a soft cloth or sponge to wipe the bed clean. For hairspray or other adhesives, isopropyl alcohol (IPA) is usually effective. Apply the cleaning agent sparingly and wipe gently.
- Thorough Cleaning: Use a suitable cleaning agent, such as IPA or a specialized 3D printer bed cleaner, to remove any remaining residue. Pay close attention to corners and edges.
- Drying: Allow the print bed to dry completely before starting a new print. This prevents moisture from interfering with adhesion.
- Inspection: Inspect the print bed for any remaining debris or imperfections. If necessary, repeat the cleaning process.
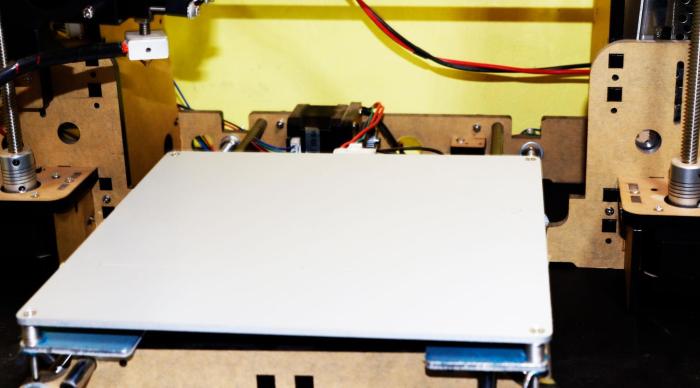
Improper Bed Leveling
Improper bed leveling is a frequent culprit behind 3D printing adhesion issues. Even a slight misalignment can significantly impact the first layer’s adhesion, leading to warping, lifting, or complete print failure. Understanding the signs of improper leveling and mastering the leveling process is crucial for successful 3D printing.
Identifying Signs of Improper Bed Leveling
Several telltale signs indicate that your 3D printer bed isn’t properly leveled. These often manifest in the first layer of a print. Consistent observation of your prints can help you quickly identify and rectify bed leveling problems.
- Uneven first layer: Parts of the first layer may be squished flat while others are too high, resulting in a visibly uneven surface.
- Nozzle dragging: The nozzle may scrape against the bed, leaving visible marks or even damaging the print surface.
- Inconsistent extrusion: The filament may extrude inconsistently, leading to gaps or blobs in the first layer, indicating inconsistent nozzle-to-bed distance.
- Warped prints: The edges of the print may lift off the bed, causing warping and ultimately print failure.
- Adhesion problems concentrated in specific areas: Poor adhesion may only occur in certain areas of the bed, highlighting uneven bed height.
Bed Leveling Process for Various Printer Types
The bed leveling process varies slightly depending on the type of 3D printer you own. Generally, the process involves adjusting the distance between the nozzle and the print bed at multiple points across the bed surface. Most printers employ either manual or automatic leveling systems.
Manual Bed Leveling
Manual bed leveling requires adjusting screws located at the corners (and sometimes the center) of the print bed. This method demands patience and precision. The process typically involves using a piece of paper (or a feeler gauge for greater accuracy) to measure the distance between the nozzle and the bed at several points. The goal is to achieve a consistent, slight drag of the paper across the entire bed surface. This is done by tightening or loosening the adjustment screws until the desired resistance is achieved at each point. Different printers have varying screw locations and adjustment mechanisms; consult your printer’s manual for specific instructions.
Automatic Bed Leveling
Automatic bed leveling (ABL) systems use sensors to measure the distance between the nozzle and the bed at multiple points. These systems significantly simplify the leveling process and often offer greater accuracy than manual leveling. ABL systems vary in their implementation; some use inductive sensors, while others use capacitive sensors or optical sensors. The specific steps for using an ABL system will depend on the make and model of your printer and the type of ABL sensor employed. The process generally involves initiating the ABL routine through the printer’s software, which then automatically adjusts the bed height based on the sensor readings.
Troubleshooting Bed Leveling Problems: A Flowchart
A systematic approach is key to resolving bed leveling issues. The following flowchart provides a step-by-step guide to troubleshooting common problems:
[Imagine a flowchart here. The flowchart would begin with “Print adhesion problems?”, branching to “Yes” and “No”. The “Yes” branch would lead to “Check for uneven first layer?”, with branches for “Yes” (leading to “Perform bed leveling”) and “No” (leading to “Check other adhesion problems”). The “Perform bed leveling” branch would have sub-branches for manual and automatic leveling methods, each leading to a “successful print?” check. If unsuccessful, a loop back to “Check for uneven first layer?” would be present. The “No” branch from “Print adhesion problems?” would lead to “Investigate other causes (e.g., insufficient bed adhesion, warped bed).”]
Closure
Successfully overcoming 3D printer bed adhesion problems requires a multifaceted approach. By understanding the causes of warped beds, mastering effective cleaning techniques, and perfecting your bed leveling process, you can significantly improve print quality and consistency. This guide has equipped you with the necessary knowledge and practical solutions to tackle these common challenges, paving the way for smoother, more successful 3D printing endeavors. Remember that consistent practice and attention to detail are key to achieving optimal results.