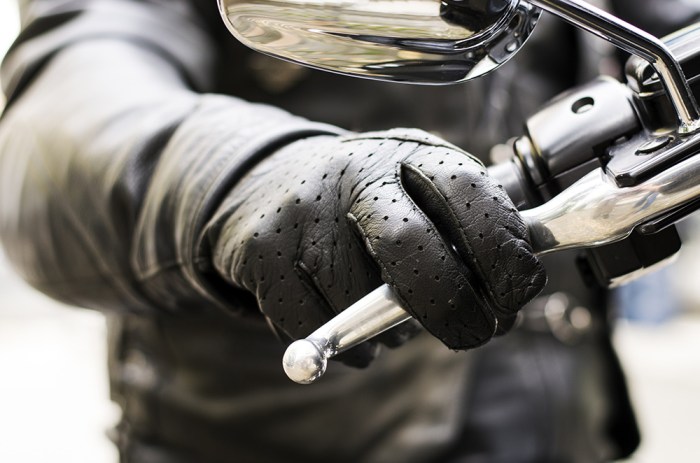
Experiencing brake trouble on your motorcycle can be unnerving, but many common issues are surprisingly easy to address with a few simple fixes. This guide focuses on three frequently encountered brake problems, offering clear, step-by-step instructions for quick resolutions. We’ll cover visual inspection techniques, troubleshooting tips, and essential maintenance advice to keep you safely on the road.
From identifying the root cause of spongy brakes to adjusting lever free play and replacing worn brake pads, we’ll equip you with the knowledge and confidence to handle minor brake repairs yourself. Remember, safety is paramount; if you’re unsure about any procedure, consult a qualified mechanic.
Identifying Common Motorcycle Brake Problems

Maintaining your motorcycle’s brakes is crucial for safe riding. Neglecting even minor issues can quickly escalate into dangerous situations. This section Artikels three common, easily fixable brake problems, guiding you through visual inspection and root cause identification. Addressing these issues promptly ensures optimal braking performance and rider safety.
Brake Lever Spongy Feel
A spongy brake lever indicates a problem with the hydraulic system. This means the lever travels further than usual before engaging the brakes, resulting in reduced braking power. This is often due to air in the brake lines, worn brake pads, or a leaking master cylinder.
A visual inspection should begin with a close examination of the brake lever itself. Look for any signs of damage or leakage. Then, carefully inspect the brake fluid reservoir for low fluid levels or discoloration. Low fluid could indicate a leak somewhere in the system. Discolored fluid often suggests contamination. Next, examine the brake lines for any signs of damage, cracks, or leaks. Finally, remove the wheel and visually inspect the brake calipers and pads. Worn brake pads will be visibly thinner than new pads and may show significant wear grooves. If the brake pads are worn, they will require replacement. Air in the lines is often indicated by a spongy feel even with good pads.
Identifying the root cause often involves tracing the fluid path. If the fluid level is low, a leak is likely. If the fluid is contaminated, the system might require a complete flush and bleed. Worn brake pads are easily identified by visual inspection.
Brake Lever Feels Hard
A hard brake lever, requiring excessive force to engage the brakes, suggests a different set of problems than a spongy lever. This can result from a number of issues, including a seized caliper piston, air in the brake lines, or a low level of brake fluid.
Begin your inspection by checking the brake fluid level in the reservoir. Low fluid levels require immediate attention. Then, examine the brake calipers for any signs of seizing. A seized caliper piston will not move freely, leading to a hard lever. Carefully inspect the brake lines again, looking for kinks or blockages that could restrict fluid flow. Lastly, remove the wheel and check the brake pads for excessive wear or damage.
Identifying the root cause will usually focus on the mechanical aspects of the system. A low fluid level usually indicates a leak somewhere in the system, while a seized caliper is a mechanical problem requiring attention.
Brake Noise (Squealing or Grinding)
Squealing or grinding noises from the brakes are usually warnings of worn brake pads or other problems within the brake system. These noises can range from a high-pitched squeal to a low-pitched grind, depending on the severity of the problem.
Begin your inspection by listening carefully to pinpoint the location of the noise. This helps you narrow down the potential problem areas. Then, remove the wheel and carefully inspect the brake pads. Worn pads often have a metallic backing plate that makes contact with the rotor, causing the squealing or grinding noise. Check for any debris caught between the pads and the rotor. Also, inspect the rotor itself for excessive wear, scoring, or warping. A warped rotor can cause pulsating brakes and also contribute to noise.
Identifying the root cause often involves a combination of listening and visual inspection. The location and character of the noise, coupled with the visual inspection of the pads and rotor, will help you pinpoint the problem. The most common cause is worn brake pads.
Comparison of Brake Issues
| Symptom | Likely Cause | Visual Inspection Focus | Solution Notes |
|---|---|---|---|
| Spongy Brake Lever | Air in lines, worn brake pads, leaking master cylinder | Brake fluid level, brake lines, brake pads, master cylinder | Bleed brakes, replace pads, repair/replace master cylinder |
| Hard Brake Lever | Seized caliper piston, low brake fluid, restricted fluid flow | Brake fluid level, brake calipers, brake lines | Free seized piston, add brake fluid, check for kinks/blockages |
| Brake Noise (Squealing/Grinding) | Worn brake pads, debris, warped rotor | Brake pads, rotor, area between pads and rotor | Replace brake pads, clean debris, replace/machine rotor |
Quick Fixes for Motorcycle Brake Problems

Addressing common motorcycle brake issues promptly can significantly enhance safety and riding experience. These quick fixes target some of the most prevalent problems, allowing for a swift return to the road. Remember, safety is paramount; if unsure about any procedure, consult a qualified mechanic.
Bleeding Motorcycle Brakes
Properly bleeding your motorcycle’s brake system removes trapped air, restoring optimal braking performance. Air in the lines compromises braking power, leading to a spongy feel at the lever or pedal. Bleeding involves forcing fluid through the lines, pushing out any air bubbles.
- Tools and Materials: Brake fluid (DOT 3, 4, or 5.1, depending on your motorcycle’s specifications), a clear tube, a wrench that fits your bleeder valve, rags or paper towels, and a helper.
- Safety Precautions: Wear safety glasses to protect your eyes from brake fluid splashes. Brake fluid is corrosive; clean up any spills immediately. Work in a well-ventilated area, as brake fluid fumes can be harmful.
- Procedure: Loosen the bleeder valve slightly. Attach the clear tube to the bleeder valve, submerging the other end in a container of brake fluid. Have your helper pump the brake lever or pedal several times and hold it. Open the bleeder valve to release fluid and air. Repeat this process until only clean brake fluid flows through the tube, with no air bubbles visible.
- Important Note: Always keep the brake fluid reservoir topped off during the bleeding process to prevent air from being drawn into the system.
Adjusting Brake Lever Free Play
Brake lever free play refers to the distance the lever moves before engaging the brakes. Incorrect free play can lead to poor braking response or even brake drag. The adjustment process varies slightly depending on the type of brake system (hydraulic or cable-actuated).
- Hydraulic Brakes: Most modern motorcycles use hydraulic brakes. Adjustments are usually made at the master cylinder, often involving a small adjuster screw or nut. Turning this screw clockwise reduces free play, while counter-clockwise increases it. Consult your motorcycle’s service manual for the precise location and adjustment procedure.
- Cable-Actuated Brakes: Older motorcycles may use cable-actuated brakes. Adjustment is typically done at the brake lever itself or near the caliper. There is usually a barrel adjuster that allows you to tighten or loosen the cable, controlling the free play.
Replacing Worn Brake Pads
Worn brake pads significantly reduce braking performance and can lead to dangerous situations. Replacing them is a relatively straightforward process.
- Tools and Materials: New brake pads (ensure they are the correct type for your motorcycle), a caliper piston compression tool, wrenches appropriate for your caliper bolts, and possibly a C-clamp for compressing the caliper piston (depending on the design).
- Procedure: First, remove the caliper from the brake disc. Next, compress the caliper piston using the compression tool to create space for the new pads. Carefully remove the old brake pads. Install the new pads, ensuring they are properly seated and aligned. Reinstall the caliper, making sure the bolts are tightened to the manufacturer’s specified torque. After reinstalling, pump the brake lever or pedal several times to ensure the pads are properly engaged and there is no free play.
Preventative Maintenance for Motorcycle Brakes
Regular maintenance is key to preventing brake issues and ensuring optimal performance.
- Regular Inspections: Visually inspect your brake pads, rotors, and calipers regularly for wear and tear. Check brake fluid levels and condition.
- Fluid Changes: Replace your brake fluid at the intervals recommended in your motorcycle’s service manual. Brake fluid absorbs moisture over time, reducing its effectiveness and corroding brake system components.
- Rotor Inspection: Inspect brake rotors for excessive wear, scoring, or warping. Replace or have them resurfaced if necessary.
- Proper Cleaning: Keep your brake components clean and free of debris. Clean the brake discs with a clean rag before each ride.
Safety and Maintenance Tips for Motorcycle Brakes
Maintaining your motorcycle’s braking system is crucial for safe riding. Neglecting regular maintenance can lead to reduced braking performance, increased stopping distances, and potentially dangerous situations. Understanding your brake system and performing routine checks are essential for preventing accidents and ensuring a smooth, safe ride.
Regular brake system maintenance and inspection are paramount for rider safety. A well-maintained braking system provides consistent and reliable stopping power, crucial for navigating various road conditions and reacting to unexpected events. Ignoring even minor issues can quickly escalate into major problems, potentially leading to accidents. Consistent checks prevent these issues and ensure the longevity of your motorcycle’s braking components.
Brake System Types and Performance
Disc brakes and drum brakes offer different braking characteristics. Disc brakes, commonly found on modern motorcycles, generally provide superior stopping power, better heat dissipation, and more consistent performance, especially in wet conditions. Drum brakes, while less common now, are simpler in design and generally require less maintenance. However, they tend to fade more easily under heavy use and offer less consistent braking performance than disc brakes, particularly when wet. The choice between the two depends largely on the motorcycle’s design and intended use. For example, high-performance motorcycles almost exclusively utilize disc brakes for their superior stopping power and responsiveness.
Brake System Inspection Checklist
A routine brake inspection should include several key components. First, visually inspect the brake pads for wear and tear. Pads that are worn down below a certain thickness require immediate replacement. Next, examine the brake rotors (for disc brakes) or drums (for drum brakes) for scoring, warping, or excessive wear. Any damage should be addressed promptly. Also, check the brake lines for leaks, cracks, or damage. Leaking brake fluid is a serious issue and requires immediate attention. Finally, inspect the brake fluid reservoir to ensure the fluid level is adequate and the fluid itself is clean. Dirty or low brake fluid can significantly impair braking performance.
Safety Tips for Riders Regarding Brake Maintenance and Usage
Safe braking practices are essential for preventing accidents. Always ensure your motorcycle’s brakes are properly maintained and inspected regularly, adhering to the manufacturer’s recommended service intervals. Before each ride, perform a quick brake check to confirm responsiveness. Avoid riding with worn brake pads or damaged components. Proper braking technique is also vital; using both brakes (front and rear) simultaneously and progressively applying pressure is safer and more effective than only using one brake or applying pressure abruptly. Finally, remember that braking distances increase significantly in wet or slippery conditions. Reduce your speed and increase your following distance accordingly to account for these conditions. Regular maintenance, combined with safe riding habits, significantly reduces the risk of brake-related accidents.
Last Recap

Maintaining your motorcycle’s braking system is crucial for safe riding. By mastering the quick fixes Artikeld in this guide, you can address minor brake issues promptly, preventing them from escalating into more serious problems. Regular inspection and preventative maintenance are key to ensuring your brakes are always in top condition, providing you with the confidence and control you need on the road. Remember to always prioritize safety and consult a professional if you encounter any issues beyond your expertise.