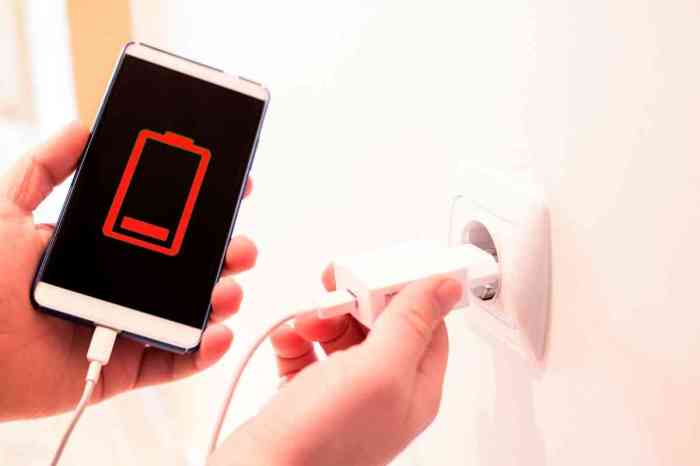
A malfunctioning iPhone charger can be incredibly frustrating, leaving you stranded without a way to power your device. This guide explores six practical solutions to diagnose and resolve common charging issues, from simple cable checks to more advanced troubleshooting steps. We’ll cover everything from identifying the source of the problem to performing basic repairs and addressing software-related glitches, ensuring you get your iPhone back up and running smoothly.
Whether your charger isn’t powering your phone, the cable is frayed, or the lightning port seems faulty, we’ll provide clear, step-by-step instructions to help you pinpoint the cause and implement the appropriate fix. This guide is designed to be accessible to users of all technical skill levels, offering solutions ranging from quick software resets to more involved hardware checks.
Identifying the Problem

Before attempting any repairs, accurately diagnosing the issue is crucial. A seemingly simple charging problem can stem from several sources, ranging from minor cable damage to a more serious power adapter malfunction. Understanding these possibilities allows for a targeted approach to troubleshooting and repair.
Troubleshooting Common iPhone Charging Issues involves a systematic examination of the entire charging system: the cable, the Lightning port on your iPhone, and the power adapter itself. Each component can be a potential source of failure, and a careful inspection will often pinpoint the culprit.
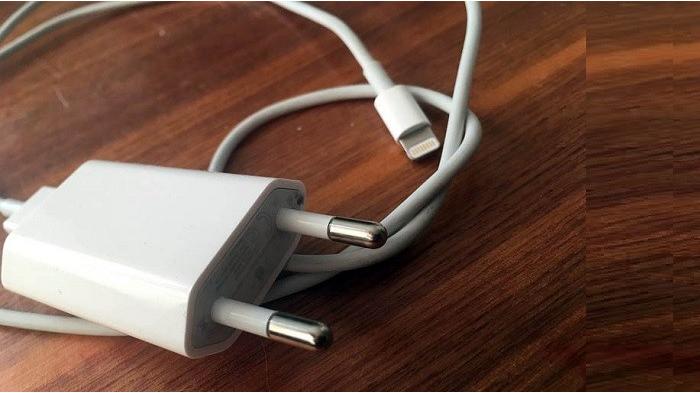
Visual Inspection of Charging Components
A thorough visual inspection is the first step. Carefully examine the charging cable for any signs of damage, such as fraying near the connectors or bends in the wire. Pay close attention to the connectors themselves; look for bent pins or any visible damage to the plastic casing. Next, inspect the Lightning port on your iPhone. Look for any debris, bent pins, or signs of physical damage. Finally, check the power adapter for any cracks, burns, or damage to the casing or power cord.
Common Symptoms and Potential Causes
Various symptoms indicate a problem with your iPhone charging system. Slow charging could be due to a partially damaged cable, a clogged Lightning port, or a failing power adapter. Intermittent charging, where the phone charges sometimes but not others, often points to a loose connection in the cable or the Lightning port. No charging at all usually suggests a more serious problem, potentially a completely broken cable, a severely damaged Lightning port, or a malfunctioning power adapter.
Comparison of iPhone Charger Problems and Solutions
| Problem | Description | Possible Cause | Solution |
|---|---|---|---|
| Cable Fraying | Visible damage to the cable’s outer sheath or internal wires, often near the connectors. | Repeated bending, stretching, or general wear and tear. | Replace the charging cable. |
| Port Damage | Bent or broken pins inside the Lightning port, or debris obstructing the connection. | Exposure to liquids, dust, or physical impact. | Carefully clean the port with a compressed air canister. If pins are bent, professional repair may be necessary. |
| Power Adapter Failure | The adapter doesn’t supply power, or it overheats excessively. | Internal component failure due to age, overheating, or power surges. | Replace the power adapter. |
| Loose Connection | Intermittent charging or no charging at all, often resolved by adjusting the cable or adapter. | Poor contact between the cable, adapter, or phone’s Lightning port. | Try different cables and adapters. Ensure a secure connection in each component. |
Testing and Replacing Components
Once you’ve identified a potential problem with your iPhone charging system, the next step involves systematically testing the individual components – the charging cable, the Lightning port, and the power adapter – to pinpoint the exact source of the malfunction. This process allows for targeted repairs, saving time and resources.
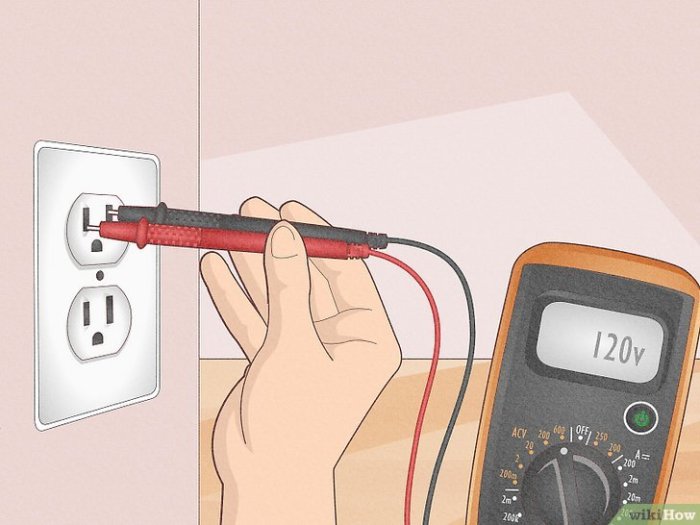
Testing the iPhone Charging Cable with a Multimeter
A multimeter is an invaluable tool for testing the integrity of your iPhone charging cable. To effectively use a multimeter, you’ll need to understand its basic functions. First, set your multimeter to the continuity test setting, often represented by a symbol resembling a diode or a bell. This setting checks for the presence of a complete electrical circuit. Then, carefully probe the exposed wires within the cable’s connector using the multimeter’s probes. The positive probe should touch one wire, and the negative probe should touch another. If the cable is intact, the multimeter should beep, indicating a continuous circuit. Repeat this process for all wire pairs within the connector. Absence of a beep suggests a break in the wire, indicating a faulty cable. Remember to exercise caution when working with electronics; avoid touching the metal probes together, as this can damage the multimeter.
Testing the iPhone’s Lightning Port for Connectivity Issues
Inspecting the Lightning port visually for any signs of damage, such as bent pins or debris, is the first step. A magnifying glass can be helpful. Next, carefully insert a known good charging cable into the Lightning port. If the cable connects securely and the phone begins charging, the port itself is likely not the problem. However, if the cable is loose or doesn’t make a proper connection, it might indicate bent or damaged pins within the port. A gentle cleaning with a compressed air canister can remove any dust or debris that might be obstructing the connection. However, attempting to repair damaged pins requires specialized tools and expertise, and it’s best left to professionals.
Identifying a Faulty Power Adapter
A malfunctioning power adapter is a common culprit in charging problems. A simple visual inspection can reveal obvious damage, such as cracks in the casing or exposed wires. If the adapter feels unusually hot during operation, this also suggests a problem. A more sophisticated test involves checking the adapter’s output voltage using a multimeter. Consult your adapter’s specifications to determine the expected voltage output. Set the multimeter to the appropriate voltage range (usually DC volts), and carefully connect the probes to the adapter’s output terminals. If the measured voltage is significantly different from the specified voltage, the adapter is likely faulty.
Replacing a Damaged Charging Cable
Replacing a damaged charging cable is often a straightforward repair. Before starting, ensure you have a replacement cable of the same type (e.g., Apple-certified). Safety is paramount. Always unplug the cable from both the wall outlet and your iPhone before starting any work. The replacement process involves carefully detaching the damaged connector from the cable, which usually requires a small amount of force and possibly a small prying tool. The new connector should then be attached to the cable. This process often involves carefully soldering the wires. This step requires soldering skills and experience and should be avoided unless you have prior experience. Improper soldering can result in further damage. If you are uncomfortable with this process, seek professional assistance.
Software and System Solutions
Software glitches can sometimes disrupt the normal charging process of your iPhone, leading to slow or interrupted charging. Addressing these software-related issues can often resolve charging problems without needing hardware repairs. This section Artikels several troubleshooting steps to identify and fix these software-based charging issues.
Software-related charging problems often manifest as inconsistent charging speeds, the phone not charging at all, or the phone displaying inaccurate battery percentage readings. These issues can stem from minor software bugs to more significant system conflicts. Resolving these problems usually involves simple steps that can be performed by the user.
Restarting the iPhone
Restarting your iPhone is a fundamental troubleshooting step for many software-related problems, including charging issues. A simple restart can clear temporary software glitches that may be interfering with the charging process. To restart your iPhone, press and hold the power button (or the side button on newer models) until the “slide to power off” slider appears. Slide the slider to turn off your device, wait a few seconds, and then press and hold the power button again to turn it back on. This process often resolves minor software conflicts that prevent efficient charging.
Updating iOS
Outdated iOS versions can sometimes contain bugs that affect various device functions, including charging. Apple regularly releases iOS updates that include bug fixes and performance improvements. To check for and install updates, navigate to Settings > General > Software Update. If an update is available, download and install it. This process can significantly improve charging performance and stability by resolving known charging-related bugs present in older software versions. For example, iOS 15.4 addressed a known bug affecting charging speeds for some iPhone models.
Checking and Cleaning the Charging Port
Debris such as lint, dust, or small particles can accumulate in the iPhone’s Lightning or USB-C port, obstructing the connection and preventing proper charging. Gently inspect the charging port with a bright light to check for any visible obstructions. If any debris is present, carefully remove it using a soft-bristled brush or a compressed air canister. Avoid using sharp objects to clean the port, as this could damage the delicate internal components. A clean charging port ensures a stable connection between your iPhone and the charger, optimizing charging efficiency.
Resetting iPhone’s Charging Settings
While less common, sometimes the iPhone’s internal charging settings might become corrupted, leading to charging problems. Resetting these settings can resolve such issues. This involves resetting network settings, which is a more comprehensive reset than just a simple restart. However, note that this will reset your Wi-Fi passwords and Bluetooth pairings, so ensure you have these readily available. To perform this reset, go to Settings > General > Transfer or Reset iPhone > Reset > Reset Network Settings. After the reset, reconnect to your Wi-Fi network and re-pair your Bluetooth devices.
Flowchart for Software-Related Charging Troubleshooting
The following flowchart Artikels the steps to troubleshoot software-related charging problems:
[Imagine a flowchart here. The flowchart would begin with “iPhone not charging correctly?”. It would branch to “Restart iPhone?” (Yes/No). A “Yes” branch would lead to “Problem Solved?” (Yes/No). A “No” branch would lead to “Update iOS?”. (Yes/No). A “Yes” branch would lead to “Problem Solved?” (Yes/No). A “No” branch would lead to “Clean Charging Port?”. (Yes/No). A “Yes” branch would lead to “Problem Solved?” (Yes/No). A “No” branch would lead to “Reset Network Settings?”. (Yes/No). A “Yes” branch would lead to “Problem Solved?” (Yes/No). A “No” branch would lead to “Seek Professional Help”. Each “Problem Solved?” (Yes) would lead to the end. Each “Problem Solved?” (No) would loop back to the previous step.]
Epilogue
Addressing a broken iPhone charger effectively involves a systematic approach combining visual inspection, component testing, and software troubleshooting. By following the steps Artikeld in this guide, you can confidently identify the root cause of your charging problems and implement the appropriate solution. Remember safety precautions when handling electrical components, and if you’re uncomfortable performing any repairs, consult a professional technician. With a little patience and these troubleshooting techniques, you can restore your iPhone’s charging capabilities and avoid the inconvenience of a dead battery.