Is your Mac running slower than a snail? A sluggish Mac can be incredibly frustrating, hindering productivity and enjoyment. Fortunately, many performance issues are easily resolved with a little troubleshooting. This guide provides ten practical tips to diagnose and fix common causes of Mac slowdown, covering both software and hardware solutions, empowering you to reclaim your Mac’s speed and efficiency.
From identifying resource-hogging applications to optimizing storage and upgrading hardware, we’ll explore a range of strategies to boost your Mac’s performance. Whether you’re a seasoned Mac user or a relative newcomer, this guide offers clear, step-by-step instructions to help you get your Mac back on track. We’ll cover everything from simple software tweaks to more involved hardware upgrades, providing you with the knowledge to tackle any performance bottlenecks you encounter.
Identifying the Bottleneck

Determining whether your Mac’s sluggish performance stems from software or hardware issues is crucial for effective troubleshooting. A systematic approach, examining software processes first before delving into hardware components, is recommended. This allows for quicker resolution in many cases, as software problems are often easier and less costly to fix.
Software Culprits and Their Impact
Excessive startup items and resource-intensive applications are common software culprits slowing down your Mac. The following table details these issues, their impact, and solutions.
| Issue | Description | Impact on Performance | Solution |
|---|---|---|---|
| Excessive Startup Items | Applications automatically launching at login consume system resources even when not actively used. | Increased boot time, higher CPU and memory usage, slower application launch times. | Use System Preferences > Users & Groups > Login Items to manage startup applications. Disable unnecessary items. |
| Resource-Intensive Applications | Applications demanding significant processing power, memory, or disk space can significantly slow down the system, especially when multiple such applications are running concurrently. | High CPU usage leading to fan noise, lagging applications, and system unresponsiveness. Memory pressure resulting in excessive swapping to the hard drive. | Close unnecessary applications. Consider upgrading to applications with better performance or using lighter alternatives. Monitor resource usage with Activity Monitor (Applications > Utilities > Activity Monitor). |
| Malware and Viruses | Malicious software consumes system resources and can lead to performance degradation and security vulnerabilities. | Slow boot times, unexpected application crashes, system instability, and data loss. | Run a full scan with reputable anti-malware software. Keep your operating system and applications updated. |
| Outdated Software | Older software may lack performance optimizations found in newer versions, leading to inefficiencies. | Slower processing speeds, increased resource consumption, and potential incompatibility issues. | Regularly update your applications and operating system through the App Store or the software developer’s website. |
Hardware Limitations Diagnosis
Identifying hardware limitations involves a systematic process of observation and testing. The following flowchart Artikels this process.
The flowchart would begin with a diamond shape asking: “Is the Mac slow even with minimal applications running?”. A “Yes” branch would lead to a rectangle: “Suspect hardware issue”. A “No” branch would lead to a rectangle: “Suspect software issue”. The “Suspect hardware issue” rectangle would branch to diamonds asking about specific hardware components: “Is RAM usage consistently high?”, “Is the hard drive consistently at 100% utilization?”, and “Are there any unusual hardware noises?”. Each “Yes” answer would lead to a rectangle suggesting a specific diagnostic test (e.g., “Check RAM using Activity Monitor,” “Run disk utility first aid,” “Listen for clicking noises from the hard drive”). Each “No” would lead back to the initial diamond. The “Suspect software issue” rectangle would branch to a rectangle: “Perform software troubleshooting steps (as Artikeld above)”.
SSD vs. HDD Performance
The type of storage drive significantly impacts system speed. Solid State Drives (SSDs) offer vastly superior performance compared to traditional Hard Disk Drives (HDDs).
- SSD (Solid State Drive): Uses flash memory, resulting in significantly faster boot times, application loading, and overall system responsiveness. Data access is nearly instantaneous. Generally more expensive per gigabyte than HDDs.
- HDD (Hard Disk Drive): Uses spinning platters and a read/write head, resulting in slower boot times, application loading, and overall system responsiveness. Data access times are significantly longer than SSDs. Generally less expensive per gigabyte than SSDs, but more susceptible to mechanical failure.
For example, booting a macOS system from an SSD might take 15-30 seconds, while booting from an HDD could take 1-3 minutes or even longer, depending on the age and health of the drive and the number of applications set to launch on startup. Similarly, launching large applications or games is significantly faster on an SSD. The difference is particularly noticeable in everyday tasks such as opening files, switching between applications, and saving documents.
Optimizing System Performance
A sluggish Mac can often be revitalized through software optimization. By managing startup items, removing unnecessary files, and utilizing built-in utilities, you can significantly improve your system’s responsiveness and overall performance. This section details practical steps to achieve these improvements.
Managing Startup Items
Startup items are applications that launch automatically when your Mac boots up. Excessive startup items can significantly increase boot time and consume valuable system resources, leading to slower performance. Managing these items is a crucial step in optimizing your Mac’s speed.
- Open System Preferences (usually found in the Apple menu in the top-left corner of your screen).
- Click on Users & Groups.
- Select your user account from the list on the left.
- Click on the Login Items tab.
- Review the list of applications that launch at login. Identify any applications you don’t need to start automatically. To remove an item, select it and click the “-“ button.
- Restart your Mac to see the effect of removing these items.
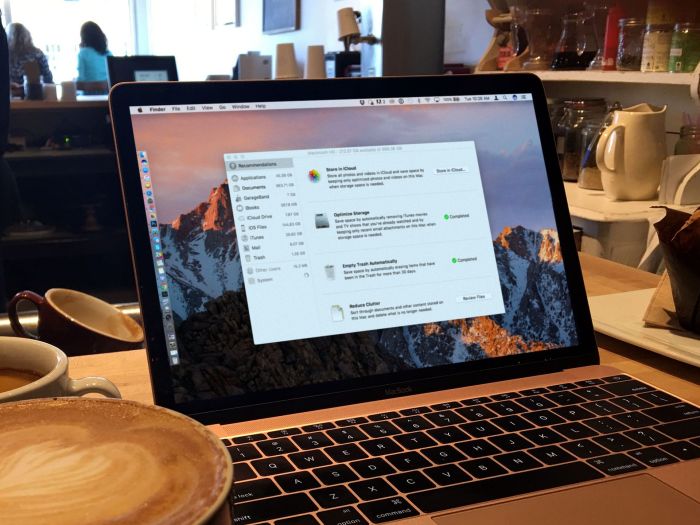
Removing Unnecessary Files and Applications
Over time, your Mac accumulates temporary files, cache data, and unused applications that consume valuable disk space and can hinder performance. Regularly removing these unnecessary files can significantly improve speed and efficiency.
Identifying large files is straightforward using Finder’s search function. In the Finder window, use the search bar (usually located in the top-right corner) and enter “kind:file size:>100m” (without the quotes) to find files larger than 100 MB. Adjust the size parameter (“100m”) as needed to target different file sizes. Carefully review the results before deleting any files.
Optimizing Storage Performance with Disk Utility
Disk Utility is a built-in macOS application that allows you to manage and optimize your storage devices. It can help identify and repair disk errors, improve performance, and potentially free up space.
- Open Disk Utility. You can find it by searching for it in Spotlight (Cmd + Space) or by navigating to Applications > Utilities.
- Select your startup disk (usually named Macintosh HD or similar) from the sidebar. This is crucial; selecting the wrong drive can lead to data loss.
- Click on the First Aid tab. This section allows for checking and repairing potential disk errors. A screenshot of this tab would show a button labeled “First Aid” and possibly some information about the selected drive, such as its capacity and format. The interface is typically clean and straightforward, utilizing clear and easily understandable language.
- Click the Run button to initiate the disk check and repair process. This may take some time depending on the size of your drive. A progress bar would visually display the progress of the process, providing feedback to the user. Any identified issues and the actions taken to resolve them would be displayed in a detailed log.
- Once the process completes, review the results for any errors reported. If errors are detected and successfully repaired, restart your Mac.
Using Activity Monitor to Identify Resource-Intensive Processes
Activity Monitor provides a detailed view of your Mac’s resource usage, allowing you to pinpoint processes that are consuming excessive CPU, memory, or disk space. This information is crucial for identifying performance bottlenecks.
Activity Monitor displays various metrics, including CPU usage (%), memory usage (MB), energy impact, and disk activity. Each process is listed with its name and associated resource consumption. By sorting the columns (CPU%, Memory, etc.), you can easily identify the most resource-intensive processes. A screenshot would show columns such as “Name,” “PID,” “% CPU,” “Memory,” “Disk,” and “Energy Impact.” High values in any of these columns indicate a process that might be impacting your system’s performance. You can then investigate the process and take appropriate action if needed, such as quitting the application or addressing any underlying issues.
Hardware Upgrades and Maintenance

Upgrading your Mac’s hardware or performing regular maintenance can significantly boost its performance and longevity. Addressing potential bottlenecks through these methods often yields better results than solely relying on software optimizations. This section details effective strategies for hardware upgrades and maintenance, focusing on RAM upgrades and internal component care.
RAM Upgrade Options
Choosing the right RAM upgrade depends on your specific Mac model and budget. Different models support different RAM types and maximum capacities. Improper RAM installation can damage your Mac, so proceed with caution and consult your Mac’s manual or reputable online resources for precise instructions. The following table provides a simplified comparison; actual performance gains vary depending on individual usage and other system factors.
| Model | RAM Option | Performance Improvement (Estimated) |
|---|---|---|
| MacBook Pro 13-inch (2020) | 16GB DDR4 | Significant improvement in multitasking and application responsiveness, especially with demanding applications like video editing or 3D modeling. Expect a 30-50% increase in speed for these tasks. |
| iMac 27-inch (2019) | 32GB DDR4 | Substantial performance boost for professional workflows involving large datasets or multiple virtual machines. Expect a 40-70% improvement in overall system responsiveness. |
| MacBook Air (M1, 2020) | N/A (RAM soldered) | RAM is soldered onto the logic board; no upgrade possible. |
Safe RAM Upgrade Procedure (Example: iMac 21.5-inch (2017))
Before beginning, ensure you have the correct RAM type and capacity for your iMac model. Power down your iMac completely and unplug the power cord. Ground yourself to prevent static electricity damage using an anti-static wrist strap.
- Open the iMac’s access panel. This typically involves carefully releasing clips or unscrewing a panel at the back of the iMac. Imagine gently prying open a small, rectangular door. Consult your iMac’s service manual for specific instructions.
- Locate the RAM slots. These are usually located near the top of the logic board. They will be clearly marked. Picture two small, rectangular slots with clips on either side.
- Gently release the existing RAM modules. Push down on the clips at both ends of the RAM module. The module will pop up at a slight angle. Think of it like gently releasing a small latch.
- Carefully remove the old RAM modules. Pull the RAM module straight up and out of the slot. Avoid bending or touching the gold connectors on the bottom of the module.
- Insert the new RAM modules. Align the notch on the RAM module with the notch in the slot. Gently push down on the module until the clips snap into place. Visualize the module fitting snugly into its slot.
- Close the access panel and reconnect the power cord. Power on your iMac.
- Check the system information to verify the new RAM is recognized.
Maintaining Internal Components
Regular cleaning and maintenance of your Mac’s internal components are crucial for optimal performance and longevity. Dust accumulation can impede cooling and lead to overheating, while degraded thermal paste reduces heat dissipation.
- Prepare your workspace: Find a well-lit, clean area with sufficient space. Gather necessary tools: compressed air canister, isopropyl alcohol (90% or higher), lint-free cloths, and new thermal paste (if needed).
- Open your Mac: Carefully disassemble your Mac following a reputable guide specific to your model. This often involves removing screws and carefully disconnecting components. Visualize carefully removing a series of panels and components.
- Clean the fans: Use compressed air to gently blow away dust from the fans. Avoid using excessive force, as this could damage the fan blades. Imagine using short bursts of air to remove dust.
- Clean other components: Carefully wipe away dust from other internal components using a lint-free cloth and isopropyl alcohol. Avoid getting any liquid on electronic components. Picture gently wiping surfaces with a clean cloth.
- Apply new thermal paste (if necessary): If the thermal paste on the CPU or GPU appears dried or cracked, apply a small amount of new thermal paste. Spread it evenly across the surface using a thin, even layer. Imagine applying a small pea-sized drop and spreading it thinly.
- Reassemble your Mac: Carefully reassemble your Mac, ensuring all components are securely connected. Visualize carefully connecting each component and replacing the panels.
Regular Mac Maintenance Checklist
Consistent maintenance prevents performance degradation and extends your Mac’s lifespan.
| Task | Frequency |
|---|---|
| Run Disk Utility (First Aid) | Monthly |
| Empty Trash | Weekly |
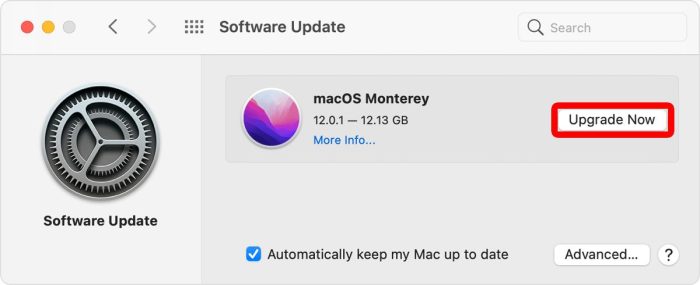
| Update macOS and Applications | As updates become available |
| Check for Malware | Monthly |
| Clean internal components (dust removal) | Every 6-12 months |
| Replace thermal paste (if needed) | Every 2-3 years |
Last Recap
By implementing these ten troubleshooting tips, you can significantly improve your Mac’s performance and responsiveness. Remember that a combination of software optimization and, if necessary, hardware upgrades can often yield the best results. Regular maintenance, both software and hardware, is key to preventing future slowdowns and ensuring your Mac runs smoothly for years to come. Take control of your Mac’s speed and enjoy a more efficient and enjoyable computing experience.