Facing a coolant leak in your BMW 3 Series can be daunting, but quick diagnosis is key. This guide offers a straightforward approach to identifying and resolving three common coolant leak problems within a short timeframe. We’ll explore visual inspection techniques, pressure testing methods, and practical repair solutions, empowering you to tackle these issues efficiently and safely.
From pinpointing the leak source—whether it’s a radiator hose, radiator itself, or water pump—to understanding the repair process and preventative maintenance, we’ll provide a comprehensive overview. Learn to differentiate between symptoms, choose appropriate repair strategies, and ultimately prevent future issues, keeping your BMW running smoothly.
Identifying the Coolant Leak Source in a BMW 3 Series
Pinpointing the source of a coolant leak in your BMW 3 Series is crucial for timely repair and preventing further engine damage. A methodical approach, combining visual inspection with pressure testing, significantly increases the chances of a successful diagnosis. This process helps to avoid unnecessary part replacements and ensures the correct repair is undertaken.
Common Coolant Leak Locations
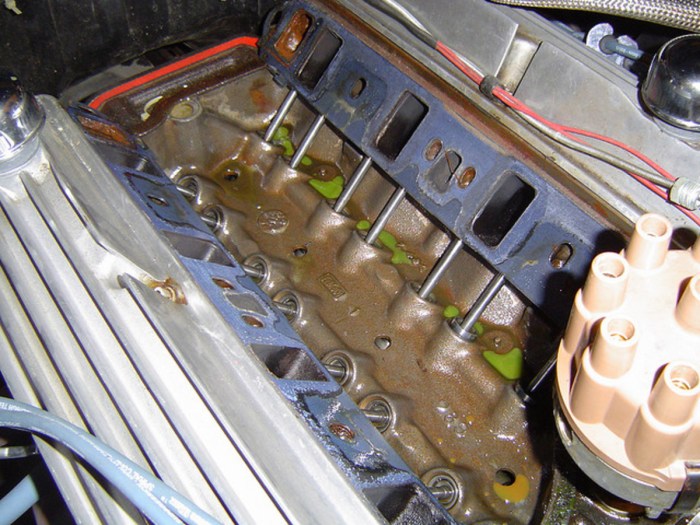
Coolant leaks in BMW 3 Series vehicles frequently originate from several key areas. These include the radiator, hoses (both upper and lower radiator hoses, heater hoses), water pump, thermostat housing, expansion tank, and head gasket. Less common, but still possible, leak points are within the engine block itself or the coolant passages within the cylinder head. Identifying the specific location requires a careful and thorough examination.
Visual Inspection for External Leaks
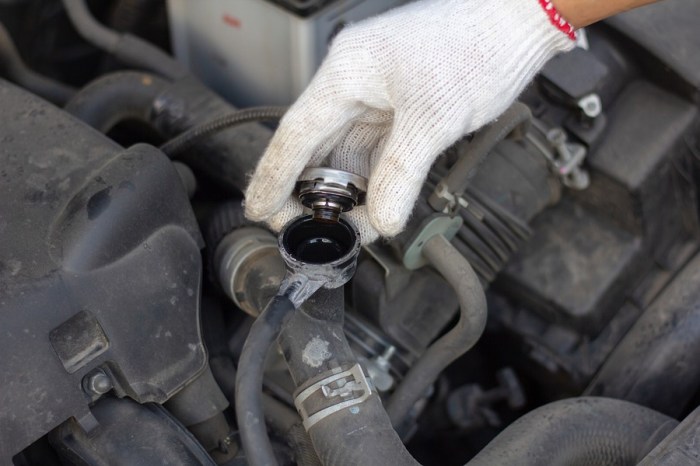
Before resorting to more advanced diagnostic methods, a thorough visual inspection is essential. Start by carefully examining the engine bay when the engine is cold. Look for visible signs of coolant, such as stains, drips, or puddles. Pay close attention to the areas mentioned above: inspect the radiator for cracks or damage, check the hoses for bulges, cracks, or loose clamps, and examine the water pump for any signs of leakage. The thermostat housing and expansion tank should also be carefully scrutinized for cracks or damage. Remember to use a flashlight to illuminate hard-to-reach areas. A clean engine bay will greatly aid in this process. If coolant is present, try to trace it back to its source. The presence of a whitish, chalky residue often indicates a leak.
Pressure Testing for Internal Leaks
If a visual inspection doesn’t reveal the source of the leak, a coolant pressure test is necessary to identify internal leaks. This involves using a coolant pressure tester kit, which typically includes a pressure gauge and a fitting that attaches to the expansion tank. The system is pressurized to a specified level, and any drop in pressure over time indicates a leak. While the system is pressurized, carefully examine all the potential leak points mentioned earlier, listening for hissing sounds and looking for any escaping coolant. This method helps to pinpoint leaks within the engine block, cylinder head, or radiator. Remember to always follow the manufacturer’s instructions for the pressure testing equipment.
Comparison of Coolant Leak Symptoms
The following table summarizes the common symptoms associated with different types of coolant leaks in a BMW 3 Series. Note that these are general symptoms and the specific manifestation may vary depending on the severity and location of the leak.
| Leak Source | Visible Leak | Other Symptoms | Coolant Pressure Test Results |
|---|---|---|---|
| Radiator | Visible leak from radiator core or connections | Low coolant level, possible overheating | Pressure drops slowly or rapidly depending on leak size |
| Hoses | Visible leak from hose cracks or connections | Low coolant level, possible overheating | Pressure drops slowly or rapidly depending on leak size |
| Water Pump | Leakage around water pump shaft seal | Low coolant level, possible overheating, weeping around the pump | Pressure drops slowly |
| Head Gasket | May not be visible externally | White exhaust smoke, milky oil, overheating, loss of compression | May not show a significant pressure drop, but other symptoms would be present. |
Repairing Common Coolant Leaks
Coolant leaks in a BMW 3 Series can range from minor inconveniences to serious engine damage if left unaddressed. Prompt identification and repair are crucial. This section details the repair procedures for three common coolant leak sources: radiator hoses, the radiator itself, and the water pump. Remember to always consult your BMW’s repair manual for specific details and torque specifications. Safety precautions, such as disconnecting the battery’s negative terminal and allowing the engine to cool completely before working, should always be followed.
Replacing a Damaged Radiator Hose
A damaged radiator hose will typically exhibit cracks, bulges, or significant wear. These hoses, usually made of rubber or reinforced silicone, are located throughout the engine bay, connecting the radiator to the engine and other components of the cooling system. Their position varies slightly depending on the specific BMW 3 Series model and year. Visual inspection is the first step in identifying a damaged hose. Replacing a damaged hose is a relatively straightforward process.
- Preparation: Gather the necessary tools: new radiator hose of the correct size and type, pliers, screwdrivers (possibly), and coolant. Locate the damaged hose. Imagine a picture showing a worn hose, exhibiting cracks along its length, clearly indicating the need for replacement. The hose is visibly darker and brittle compared to a new hose.
- Disconnecting the Hose: Carefully loosen the hose clamps securing the hose to its connections using pliers. Imagine a close-up image showing the clamp being loosened with pliers. The image should highlight the clamp’s position on the hose.
- Removing the Hose: Gently pull the hose off the connections. If it’s stubborn, a little lubricant might help. Imagine an image depicting the careful removal of the old hose, emphasizing the need for gentle handling to avoid further damage.
- Installing the New Hose: Slide the new hose onto the connections, ensuring a snug fit. Tighten the hose clamps securely, but avoid over-tightening. An image showing the new hose correctly installed and the clamps securely tightened is envisioned here.
- Refilling the Coolant: After installing the new hose, carefully refill the cooling system with the correct type of coolant, following your BMW’s specifications. Imagine an image showcasing the process of carefully refilling the coolant reservoir.
Repairing a Leaking Radiator
A leaking radiator usually manifests as a visible leak or a persistent coolant drip from the radiator itself. Repairing a leaking radiator might involve patching a small hole or, more likely, replacing the entire radiator. For a minor leak, a radiator stop leak product might be a temporary solution. However, a complete radiator replacement is generally the more reliable and long-term solution. The tools needed include a radiator drain pan, wrenches, screwdrivers, and potentially a new radiator.
- Preparation: Drain the coolant completely into a drain pan. Imagine an image depicting the radiator with a drain pan positioned underneath it to collect the coolant.
- Removing the Radiator: Disconnect the radiator hoses, and remove any securing bolts or clips holding the radiator in place. Imagine a sequence of images showcasing the various steps of disconnecting hoses and removing mounting bolts and clips.
- Installing the New Radiator: Carefully install the new radiator, ensuring proper alignment and secure fastening. Reconnect the hoses and refill the cooling system with coolant. An image demonstrating the installation of the new radiator and the reconnection of hoses is envisioned here.
Fixing a Leaking Water Pump
A faulty water pump often presents with a whining noise, overheating, or visible coolant leakage around the pump itself. The water pump is located on the engine block and is responsible for circulating coolant throughout the system. Replacing a water pump requires mechanical skill and specialized tools.
- Identifying a Faulty Water Pump: Listen for unusual noises, check for coolant leaks, and monitor the engine temperature. A visual inspection may reveal cracks or damage to the pump housing. Imagine an image depicting a damaged water pump with visible cracks and leakage.
- Replacing the Water Pump: This process involves draining the coolant, removing the serpentine belt (if applicable), detaching the water pump from the engine block, and installing a new water pump. Specialized tools may be needed for this procedure. Imagine a series of images showing the steps involved in removing the old water pump and installing the new one.
Coolant Leak Repair/Replacement Decision Flowchart
A flowchart would visually represent the decision-making process. For example, a minor hose leak might warrant repair, while a severely damaged radiator would necessitate replacement. The flowchart would consider the extent of the damage, the cost of repair versus replacement, and the vehicle’s overall condition.
Preventative Maintenance and Long-Term Solutions

Proactive maintenance is key to extending the lifespan of your BMW 3 Series’ cooling system and preventing costly repairs. Regular checks and preventative measures significantly reduce the likelihood of coolant leaks and related issues. By understanding the system and implementing these strategies, you can enjoy reliable performance and avoid unexpected breakdowns.
Regular maintenance is paramount to preventing future coolant leaks in your BMW 3 Series. This involves more than just topping off the coolant occasionally; it necessitates a comprehensive approach that considers several key aspects of the cooling system’s health. Ignoring these preventative measures can lead to more serious and expensive problems down the line.
Coolant Types and Suitability
BMW 3 Series vehicles typically require a specific type of coolant, often a 50/50 mix of BMW-approved coolant and distilled water. Using the incorrect coolant can lead to corrosion, reduced cooling efficiency, and ultimately, system failure. Choosing the right coolant is crucial for maintaining the integrity of the system’s components and preventing leaks. Always consult your owner’s manual to verify the recommended coolant type and mixture ratio for your specific model year and engine. Using anything other than the manufacturer’s specified coolant can void warranties and potentially damage your engine. For example, using a coolant designed for a different type of engine could lead to incompatible chemical reactions, resulting in corrosion and leaks.
Potential Causes for Recurring Coolant Leaks and Preventative Measures
Addressing recurring coolant leaks requires identifying the root cause. Many leaks stem from compromised hoses, failing water pumps, or damaged radiators. However, other less obvious culprits, such as a cracked pressure cap or a faulty thermostat, can also contribute to recurring issues. Preventative measures should focus on addressing these potential failure points.
- Worn Hoses: Regularly inspect hoses for cracks, bulges, or signs of deterioration. Replace any damaged hoses promptly. Consider replacing all hoses at once during a major service to avoid future problems. Visual inspection should be done at least once a year, or more frequently if you frequently drive in harsh conditions.
- Failing Water Pump: A failing water pump can leak coolant, leading to overheating. Listen for unusual noises from the water pump and have it inspected during routine maintenance. Regular coolant flushes help to remove debris that can damage the pump’s seals.
- Damaged Radiator: Inspect the radiator for leaks, dents, or damage. A damaged radiator should be repaired or replaced immediately. Regularly flushing the radiator helps remove debris that can contribute to damage. Avoid driving through deep puddles or off-road conditions that could damage the radiator.
- Cracked Pressure Cap: The pressure cap maintains proper system pressure. A faulty cap can cause leaks or overheating. Regularly inspect and replace the pressure cap as needed. A simple pressure test can confirm its functionality.
- Faulty Thermostat: A malfunctioning thermostat can cause the engine to overheat or run too cool, potentially leading to leaks. Have the thermostat checked during routine maintenance. A stuck-open thermostat will not maintain optimal engine temperature.
Coolant Flushes and System Inspections
Regular coolant flushes remove contaminants and corrosion inhibitors from the cooling system, maintaining its efficiency and preventing corrosion. This preventative measure extends the lifespan of components and reduces the risk of leaks. A visual inspection of all hoses, clamps, and the radiator should be part of every coolant flush service. A thorough inspection during a coolant flush can often reveal minor leaks before they become major problems, saving you significant repair costs in the long run. For instance, a small pinhole leak in a hose might only be noticeable when the system is under pressure, as during a coolant flush.
Final Thoughts

Addressing coolant leaks promptly is crucial for maintaining your BMW 3 Series’s engine health and longevity. By understanding the common causes, employing effective diagnostic techniques, and implementing preventative measures, you can significantly reduce the risk of costly repairs down the line. This guide has provided a practical framework for resolving three frequent coolant leak problems; remember that regular maintenance is the best defense against future issues.