Maintaining your RV’s electrical system is crucial for a comfortable and safe journey. This guide delves into ten common electrical wiring problems encountered by RV owners, providing detailed explanations of their causes, consequences, and effective solutions. We’ll equip you with the knowledge and tools to troubleshoot and repair these issues, ensuring your RV’s electrical system remains reliable and efficient.
From identifying faulty components like fuses and breakers to mastering safe wiring practices, this comprehensive guide will empower you to tackle electrical repairs confidently. We’ll cover essential tools, step-by-step repair procedures, and preventative measures to avoid future problems, ultimately helping you maintain your RV’s electrical system and enjoy worry-free travels.
Common RV Electrical Wiring Problems
RV electrical systems, while convenient, are susceptible to various issues due to their compact nature and exposure to the elements. Understanding these problems and their causes is crucial for maintaining a safe and functional RV. Ignoring these issues can lead to anything from minor inconveniences to significant safety hazards.
Loose or Corroded Connections
Loose or corroded connections are a frequent culprit in RV electrical malfunctions. Vibration during travel, exposure to moisture, and the use of improper connectors can all contribute to this problem. A loose connection may result in intermittent power, flickering lights, or complete failure of a circuit. Corrosion creates high resistance, leading to overheating and potentially fire hazards. Ignoring these issues can lead to component failure, increased energy consumption, and, most seriously, electrical fires.
Overloaded Circuits
RVs often have limited electrical capacity. Plugging in too many appliances simultaneously, particularly high-draw items like air conditioners and microwaves, can overload circuits. This overload can trip circuit breakers, blow fuses, or, in the worst-case scenario, cause overheating and fires. Consequences include burnt-out appliances, damaged wiring, and the risk of fire. For example, simultaneously running a hair dryer, microwave, and air conditioner in an RV with a limited amperage system is a recipe for disaster.
Faulty Wiring
Damaged or deteriorated wiring, often caused by rodents chewing through insulation or exposure to harsh weather conditions, can lead to short circuits, power outages, and even fires. The insulation breakdown exposes live wires, creating a significant shock hazard. Ignoring faulty wiring poses a considerable safety risk. A real-life example would be a wire chafing against a metal chassis, eventually causing a short circuit and potentially starting a fire.
Grounding Issues
Improper grounding can lead to shock hazards and equipment malfunction. A faulty ground connection provides a path for stray current to flow through the RV chassis, posing a risk to occupants. This can result in erratic operation of appliances and the potential for electric shock. Ignoring grounding problems is extremely dangerous.
Faulty Inverters
Inverters convert DC power from the RV’s batteries to AC power for household appliances. A malfunctioning inverter can result in no power to AC-powered devices or even damage to sensitive electronics. This might lead to inconvenience or damage to expensive equipment.
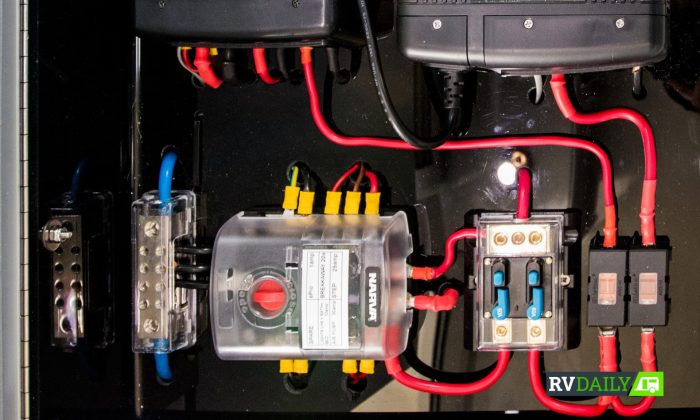
Bad Circuit Breakers or Fuses
Circuit breakers and fuses are safety devices designed to protect the electrical system. If a breaker or fuse keeps tripping or blowing, it indicates a problem elsewhere in the circuit, such as an overload or short circuit. Ignoring this can lead to damage to the electrical system or even fire.
Problems with the Shore Power Connection
A faulty shore power connection, including issues with the cord, plug, or RV’s inlet, can prevent the RV from receiving power. This could result in a complete loss of power to the RV. Checking the connection, cord, and inlet regularly is essential.
Wiring Problems in Appliances
Electrical problems can originate within individual appliances themselves. A faulty appliance can overload the circuit or create a short circuit. This requires appliance-specific troubleshooting and repair.
Water Damage
Water intrusion is a major cause of electrical problems in RVs. Water can damage wiring, corrode connections, and cause short circuits. The consequences can range from minor malfunctions to serious electrical fires. Prevention through proper sealing and maintenance is key.
Incorrect Wiring
Improper wiring during installation or modification can lead to a multitude of issues, including short circuits, fire hazards, and malfunctioning appliances. Professional installation is highly recommended for any significant electrical work.
| Problem | Cause | Consequence | Frequency |
|---|---|---|---|
| Loose/Corroded Connections | Vibration, moisture, improper connectors | Intermittent power, overheating, fire | High |
| Overloaded Circuits | Too many appliances running simultaneously | Tripped breakers, blown fuses, fire | High |
| Faulty Wiring | Rodent damage, weather exposure | Short circuits, power outages, fire | Medium |
| Grounding Issues | Faulty ground connection | Shock hazard, equipment malfunction | Medium |
| Faulty Inverter | Component failure | No AC power, damage to electronics | Medium |
| Bad Breakers/Fuses | Overload, short circuit | System damage, fire | High |
| Shore Power Issues | Faulty cord, plug, or inlet | No power to RV | Medium |
| Appliance Wiring Problems | Internal appliance fault | Overload, short circuit | Medium |
| Water Damage | Water intrusion | Wiring damage, corrosion, fire | Medium |
| Incorrect Wiring | Improper installation/modification | Short circuits, fire, malfunction | Low |
Essential Tools for RV Electrical Repairs

Successfully diagnosing and repairing RV electrical issues requires the right tools. Having these tools on hand will significantly reduce troubleshooting time and ensure safe repairs. This section details twelve essential tools categorized for clarity, along with their functions and safe usage practices.
Proper tool selection and safe handling are paramount when working with electricity. Improper use can lead to injury or damage to your RV’s electrical system. Always prioritize safety.
Testing Tools
A selection of testing tools is crucial for identifying electrical problems. These tools help determine voltage levels, continuity, and the presence of shorts or grounds. Using them correctly ensures accurate diagnoses.
- Non-contact Voltage Tester: This tool detects the presence of voltage without physical contact, helping identify live wires safely. It typically lights up or beeps when near a voltage source.
- Multimeter: A multimeter is a versatile tool measuring voltage, current, and resistance. It’s essential for diagnosing various electrical issues, from checking battery voltage to identifying shorts in wiring.
- Clamp Meter: This specialized meter measures current without disconnecting wires. It’s useful for measuring the current draw of appliances and identifying overloaded circuits.
Cutting and Stripping Tools
Properly cutting and stripping wires is crucial for creating safe and reliable connections. These tools ensure clean cuts and prevent damage to the wires.
- Wire Strippers/Cutters: These tools are designed to precisely strip insulation from wires without nicking the conductor. Different sizes accommodate various wire gauges.
- Diagonal Cutters (Dykes): These cutters provide a clean cut for wires, essential for removing damaged sections or preparing wires for connections.
Connection Tools
Creating secure connections is vital for reliable electrical systems. These tools help ensure connections are properly made and remain secure.
- Crimping Tool: This tool is used to securely crimp connectors onto wires, ensuring a strong and reliable connection. Different crimping dies are available for various connector types.
- Wire Connectors (Butt Connectors, Ring Terminals): These connectors provide a convenient way to join wires or connect wires to terminals. Choose the appropriate size and type for the wire gauge and application.
- Soldering Iron and Solder: Soldering provides a more robust and waterproof connection than crimping alone, particularly in damp RV environments. However, it requires practice and appropriate safety precautions.
Other Essential Tools
These tools, while not directly electrical, are vital for completing RV electrical repairs efficiently and safely.
- Screwdrivers (Phillips and Flathead): These are essential for removing and installing electrical components, panels, and terminal blocks.
- Pliers (Needle-nose and Lineman’s): Needle-nose pliers are useful for manipulating small wires and components, while lineman’s pliers provide more grip for larger tasks.
- Electrical Tape: Used to insulate connections and provide strain relief for wires. Ensure it’s rated for electrical use.
- Flashlight: A bright flashlight is crucial for working in dark or confined spaces.
Safety Precautions
- Always disconnect power to the circuit before working on it. Use a circuit breaker or disconnect switch.
- Wear safety glasses to protect your eyes from flying debris or sparks.
- Use insulated tools to prevent electrical shock.
- Never work with wet hands or in wet conditions.
- If unsure about any aspect of the repair, consult a qualified electrician.
- Always double-check your work before restoring power.
- Be aware of potential hazards such as sharp edges and exposed wires.
Troubleshooting and Repair Procedures
This section details step-by-step repair procedures for ten common RV electrical problems, demonstrating the use of twelve essential tools. We’ll cover identifying faulty components and safe wiring practices to prevent future issues. Remember to always disconnect power before working on any electrical system.
Effective troubleshooting involves a systematic approach. Begin by visually inspecting the affected area for obvious damage like loose connections, burnt wires, or tripped breakers. Then, use a multimeter to test voltage, current, and continuity to pinpoint the exact problem. Remember to consult your RV’s wiring diagram for guidance.
Identifying Faulty Wiring Components
Identifying faulty components is crucial for efficient repairs. Fuses will be visibly blown (broken filament), breakers will be in the “off” position, and faulty wires may show signs of melting, discoloration, or excessive heat damage. A multimeter is essential for confirming component failure. For example, a blown fuse will show no continuity, a tripped breaker will show no voltage output, and a broken wire will show infinite resistance. Always replace fuses and breakers with components of the correct amperage rating.
Repair Procedure: No Power to Outlets
This problem often stems from a tripped breaker or a blown fuse. First, locate your RV’s breaker panel and check if any breakers are tripped (switched to the “off” position). Reset any tripped breakers by firmly switching them to the “on” position. If the problem persists, check the fuses using a multimeter to confirm continuity. Replace any blown fuses with identical replacements. If the problem remains, use a multimeter to test the voltage at the outlet. No voltage indicates a problem further upstream in the circuit. Use wire strippers to carefully inspect the wiring connections at the outlet and panel.
Repair Procedure: Faulty Exterior Lights
Faulty exterior lights may indicate a blown bulb, a broken wire in the wiring harness, or a problem with the switch. Start by checking the bulb. Replace it with a known good bulb. If the light still doesn’t work, use a multimeter to check the voltage at the light fixture. No voltage indicates a problem with the wiring or switch. Trace the wiring from the light fixture to the switch and panel, carefully inspecting for any breaks, loose connections, or damaged insulation. Use your wire strippers, crimping tool, and electrical tape to repair any damaged wiring or connections.
Repair Procedure: Malfunctioning Appliances
Malfunctioning appliances could result from a blown fuse, a tripped breaker, a faulty appliance, or a wiring issue. Begin by checking the corresponding fuse or breaker. If those are fine, use a multimeter to check the voltage at the appliance’s power cord. No voltage suggests a problem with the wiring. If there’s voltage, the appliance itself may be faulty. A multimeter can also test the appliance’s internal components, though this is best left to a qualified technician if not experienced.
Repair Procedure: Intermittent Lighting
Intermittent lighting often suggests loose connections or corroded wires. Carefully inspect all wiring connections and terminals related to the affected lights. Use your wire brush to clean any corroded terminals. Tighten all connections using your screwdriver and pliers. If necessary, use a crimping tool to secure any loose wire connections. Apply electrical tape to ensure proper insulation.
Repair Procedure: Ground Fault Issues
Ground faults can be dangerous and often manifest as tripped GFCI breakers. Locate the tripped breaker and reset it. If it trips again immediately, there’s a ground fault somewhere in the circuit. This requires careful tracing of the wiring and a thorough inspection for damaged insulation or bare wires that may be contacting a grounded surface. Use your multimeter to check for continuity between the hot wire and ground. This should show infinite resistance.
Repair Procedure: Low Voltage Issues
Low voltage can stem from loose connections at the battery, converter, or inverter. Begin by inspecting the battery terminals for corrosion and tightness. Clean the terminals with a wire brush and tighten connections with a wrench. Then, check the connections at the converter and inverter, repeating the cleaning and tightening process. Use a multimeter to measure the voltage at various points in the system to identify where the voltage drop occurs.
Repair Procedure: Non-Functioning 12V System
A non-functioning 12V system often points to a dead battery, a faulty converter, or a problem with the wiring. First, test the battery voltage using a multimeter. A low voltage indicates a dead or weak battery. If the battery is good, check the converter’s output voltage. If the converter is faulty, it needs to be replaced. If both the battery and converter are working correctly, then inspect the 12V wiring for loose connections or breaks.
Repair Procedure: Overheating Wires
Overheating wires are a serious safety hazard, often caused by loose connections, overloaded circuits, or damaged insulation. Inspect all wiring for loose connections, bare wires, or damaged insulation. Tighten any loose connections. Repair or replace any damaged wires using proper wire connectors and electrical tape. Ensure that circuits aren’t overloaded.
Repair Procedure: Blown Fuses/Tripped Breakers
Blown fuses or tripped breakers indicate an overloaded circuit or a short circuit. First, identify the circuit by checking the panel and associated labels. Then, investigate the devices connected to that circuit. Remove any unnecessary devices to reduce the load. If the fuse blows again or the breaker trips immediately, there is a short circuit that needs to be found and repaired. Use a multimeter to test for continuity between hot and ground wires. This indicates a short circuit.
Safe Wiring Practices
Safe wiring practices are crucial for preventing future problems and ensuring safety. Here are some key points:
- Always disconnect power before working on any electrical system.
- Use the correct gauge wire for the amperage of the circuit.
- Ensure proper insulation on all wires.
- Use wire connectors rated for the wire gauge and amperage.
- Never overload circuits.
- Properly ground all electrical components.
- Use heat-resistant wire loom to protect wires from abrasion and heat.
- Inspect wiring regularly for damage.
Ultimate Conclusion

By understanding the common electrical wiring problems in RVs, equipping yourself with the right tools, and following safe repair procedures, you can significantly enhance your RV’s reliability and safety. This guide provides a practical and comprehensive approach to resolving these issues, enabling you to confidently maintain your RV’s electrical system and enjoy the freedom of the open road with peace of mind. Remember, preventative maintenance is key; regular inspections and proactive repairs can prevent more serious and costly issues down the line.